Contents
You might think mold prevention is complicated, but it’s actually quite straightforward if you follow the right steps. After water damage, acting quickly and efficiently is essential to preventing mold growth. You’ll need to assess the damage, dry out the area, and control humidity levels effectively. Understanding these key actions will help you safeguard your space, ensuring a mold-free environment. Let’s explore practical tips that can make a significant difference in your home.
Key Takeaways
- Conduct a thorough inspection to identify moisture sources and document any damage for effective remediation planning.
- Use wet/dry vacuums and dehumidifiers to extract water and maintain indoor humidity between 30% and 60%.
- Clean and disinfect affected areas immediately with EPA-approved products to prevent mold growth.
- Improve ventilation by opening windows, using fans, and installing exhaust fans in high-humidity areas.
- Regularly monitor humidity levels with hygrometers and inspect for mold signs in moisture-prone areas.
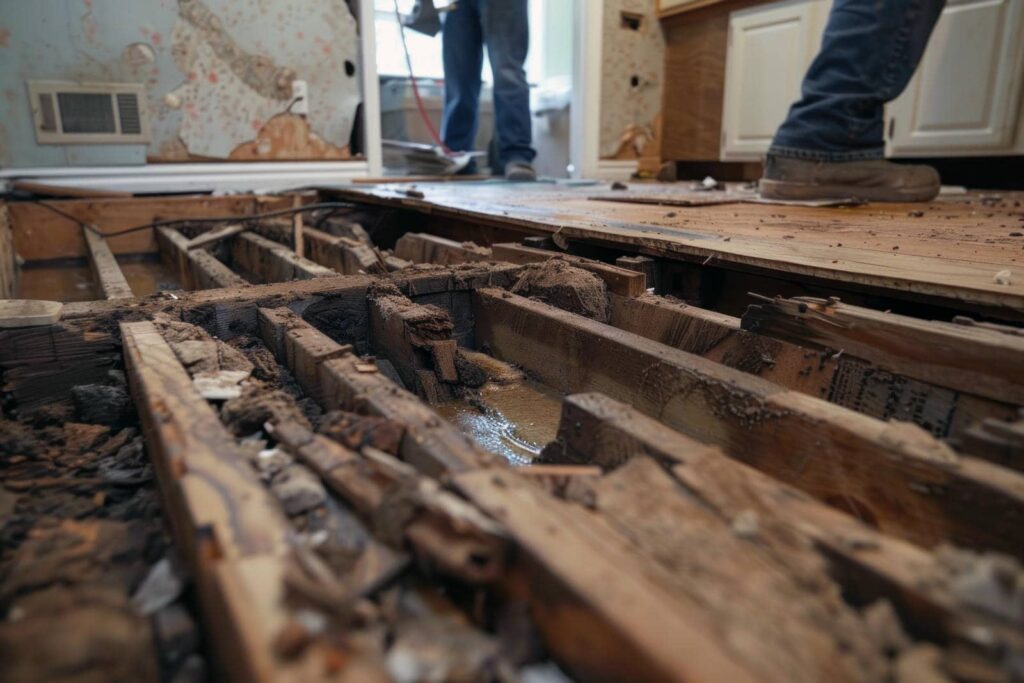
Assess the Extent of Water Damage
Before you tackle mold prevention, it’s essential to assess the extent of water damage in your space.
Start your water damage assessment by visually inspecting all affected areas. Look for discoloration, warping, or peeling paint that indicates moisture presence. Use a moisture meter to quantify the moisture content in walls and floors; this is vital for an accurate damage severity analysis.
Pay close attention to hidden areas like behind appliances or under carpets, as these spots can harbor moisture. Document your findings with photographs and notes to create a thorough report.
This assessment will help you prioritize remediation efforts and determine if professional help is necessary. Remember, addressing issues early can prevent mold growth and further structural damage.
Remove Standing Water Promptly
Act quickly to remove standing water, as it’s a critical step in preventing mold growth after water damage.
Delaying this process can lead to significant mold issues, so you need to focus on effective water extraction methods.
- Use a Wet/Dry Vacuum: This tool is essential for efficiently sucking up standing water from floors and carpets.
Make sure you follow the manufacturer’s instructions for peak performance.
- Utilize Sump Pumps: If you have large amounts of standing water, a sump pump can expedite the removal process.
Position it in the lowest area to maximize water extraction.
- Mop and Towels: For residual water, use mops, towels, or absorbent cloths to soak up any remaining moisture.
Change them frequently to maintain effectiveness.
Dry Out Affected Areas Thoroughly
Removing standing water is just the first step; drying out affected areas thoroughly is essential to stop mold from taking hold. To achieve this, focus on effective water extraction and maximizing air circulation. Begin by using pumps or wet vacuums to remove residual moisture. Then, open windows and doors to facilitate air movement. Fans can also help boost circulation, aiding the drying process.
| Steps | Tips |
|---|---|
| Water Extraction | Use a wet vacuum for best results. |
| Air Circulation | Open windows and use fans. |
| Inspect Materials | Check carpets and drywall for dampness. |
| Monitor Humidity | Keep humidity levels below 60%. |
| Timeframe | Allow 24-48 hours for drying. |
Use Dehumidifiers to Reduce Humidity
To effectively combat mold growth after water damage, using dehumidifiers can greatly reduce humidity levels in your home.
Proper dehumidifier placement is essential for achieving ideal humidity control. Here are three key tips to maximize your dehumidifier’s effectiveness:
Positioning: Place the dehumidifier in the most affected areas, ideally near the source of moisture. This helps to quickly draw out excess water vapor.
Airflow: Verify that the dehumidifier has enough space around it for airflow. Avoid placing it in corners or behind furniture, as this can hinder its efficiency.
Continuous Drainage: If possible, set up a continuous drainage option. This allows for uninterrupted operation without needing to empty the water tank frequently.
Clean and Disinfect Surfaces
After water damage, it’s essential to clean and disinfect surfaces effectively to prevent mold growth.
Use appropriate cleaning solutions that target mold spores, and don’t overlook high-risk areas like bathrooms and kitchens.
Use Appropriate Cleaning Solutions
Using appropriate cleaning solutions is essential for effectively addressing surfaces affected by water damage. Choosing the right cleaner helps prevent mold growth and ensures thorough disinfection.
Consider the following options:
Natural Cleaners: Vinegar and baking soda are effective for killing mold spores and can be used safely on most surfaces.
Chemical Solutions: Look for EPA-approved disinfectants containing bleach or hydrogen peroxide, especially for porous materials like wood.
Specialized Mold Cleaners: These products are formulated specifically to tackle mold and mildew, providing a focused approach.
Always test any cleaning solution on a small area first to avoid damage.
Focus on High-Risk Areas
Identifying and focusing on high-risk areas in your home is essential for preventing mold after water damage. Mold hotspots often include bathrooms, basements, kitchens, and laundry rooms. Clean and disinfect these surfaces immediately after water exposure to inhibit mold growth. Use a mixture of water and bleach or specialized mold cleaning solutions to tackle these areas effectively.
| High-Risk Area | Recommended Action |
|---|---|
| Bathroom | Scrub tiles, fixtures |
| Basement | Dry out, treat walls |
| Kitchen | Clean countertops, sink |
| Laundry Room | Wipe appliances, floors |
Seal Leaks and Gaps to Prevent Future Water Intrusion
To prevent future water intrusion, start by identifying potential leak sources around your home, such as windows, pipes, and roofs.
Use quality sealants to effectively close any gaps and cracks you find.
Regular maintenance checks are essential to ensure your seals remain intact and functional over time.
Identify Potential Leak Sources
While you may not always see signs of water intrusion, potential leak sources can lurk in hidden areas of your home, leading to costly damage and mold growth.
Effective leak detection is essential for maintaining a dry environment. Here are three areas to inspect regularly for leaks:
Pipes and Fixtures: Check under sinks and around toilets for signs of moisture or corrosion.
Basements and Crawl Spaces: Look for dampness or standing water, indicating potential leaks in foundation walls.
Roof and Gutters: Inspect for missing shingles and clogged gutters that can lead to water pooling.
Use Quality Sealants
Using quality sealants is crucial for sealing leaks and gaps that can lead to future water intrusion. By selecting the right sealant types and employing proper application techniques, you can create a watertight barrier.
| Sealant Type | Best Use | Application Technique |
|---|---|---|
| Silicone | Windows and doors | Apply with a caulking gun |
| Acrylic | Indoor walls | Smooth with a putty knife |
| Polyurethane | Exterior surfaces | Use a paintbrush for even coverage |
| Butyl Rubber | Roofs and gutters | Press firmly to ensure adhesion |
Choose the sealant that best fits your needs and follow the manufacturer’s instructions for peak results. Taking these steps will help prevent mold growth and water damage in the future.
Regular Maintenance Checks
Regular maintenance checks are essential for identifying and sealing leaks and gaps before they lead to significant water intrusion.
Implementing these preventative measures ensures your home remains safe and dry.
Here’s what you should focus on during your seasonal inspections:
Inspect Roof and Gutters: Look for damaged shingles or clogged gutters that can cause water pooling.
Check Windows and Doors: Examine seals and caulking for wear. Replace any that show signs of deterioration.
Evaluate Plumbing: Regularly check for leaks under sinks and around appliances. Tighten any loose connections.
Apply Mold-Resistant Products
Applying mold-resistant products is one of the most effective strategies to combat mold growth after water damage.
Start by using mold-resistant paint for your walls and ceilings. This specialized paint contains additives that inhibit mold spores from settling and growing, providing an extra layer of protection.
Additionally, consider applying antimicrobial coatings on surfaces that are prone to moisture, like kitchen and bathroom fixtures. These coatings prevent mold and reduce the proliferation of bacteria and mildew.
When selecting products, verify they’re specifically labeled as mold-resistant.
Follow the manufacturer’s instructions for application to maximize their effectiveness.
Improve Ventilation in Damp Areas
Mold-resistant products can greatly help, but they’re only part of the solution.
To effectively combat mold after water damage, you need to improve ventilation in damp areas. Implementing effective ventilation strategies enhances air circulation, reducing moisture buildup and preventing mold growth.
Here are three practical ways to boost ventilation:
Use Exhaust Fans: Install exhaust fans in bathrooms and kitchens to expel humid air outside.
Open Windows Regularly: Whenever the weather permits, open windows to promote fresh air flow and reduce humidity.
Install Air Vents: Consider adding air vents in areas such as basements and crawl spaces to ensure steady airflow.
Monitor Humidity Levels Regularly
To effectively prevent mold growth, you need to monitor humidity levels regularly.
Using hygrometers can help you track moisture in your home, ensuring it stays within the ideal range of 30-60%.
Keeping tabs on these levels allows you to take action before mold becomes a problem.
Use Hygrometers Effectively
Since maintaining ideal humidity levels is crucial in preventing mold growth, using hygrometers effectively can make all the difference. Here’s how to optimize your humidity measurement:
Regular Calibration: Verify your hygrometer is calibrated correctly. This ensures accurate humidity readings, allowing you to respond effectively.
Strategic Placement: Position your hygrometer in areas prone to moisture, like basements or bathrooms. This helps you monitor trouble spots directly.
Frequent Monitoring: Check humidity levels at different times of the day. This will give you an extensive understanding of fluctuations, aiding in timely interventions.
Ideal Humidity Range
Maintaining the ideal humidity range is vital for preventing mold growth in your home. Ideally, indoor humidity should stay between 30% and 60%.
Frequent monitoring is essential, as fluctuations can lead to mold issues. Use hygrometers to measure humidity levels regularly; if you notice readings above 60%, take action. You can implement humidity control measures like dehumidifiers or air conditioners to reduce moisture levels.
Additionally, ensure proper ventilation in high-moisture areas, such as kitchens and bathrooms. If humidity levels drop below 30%, consider using a humidifier to maintain balance.
Conduct Routine Inspections for Signs of Mold
Regularly conducting inspections for signs of mold is vital, especially after experiencing water damage.
Mold detection is essential since it can develop quickly in damp environments. To ensure you stay ahead of potential mold issues, establish an inspection frequency that suits your situation—monthly or quarterly may be ideal.
Here are three key areas to inspect:
Basements and Crawl Spaces: Check for moisture accumulation, discoloration, or musty odors.
Walls and Ceilings: Look for water stains, bubbling paint, or peeling wallpaper, which can indicate hidden mold growth.
HVAC Systems: Inspect air ducts and filters for mold spores, as they can spread mold throughout your home.
Final Thoughts
In the battle against mold after water damage, your proactive steps can be your strongest shield. By following these DIY tips, you’re not just cleaning; you’re fortifying your home against future threats. Remember, mold thrives in dampness—so keep your environment dry and well-ventilated. Regular inspections and maintenance can make all the difference, ensuring your space remains a safe haven. Stay vigilant, and let your home breathe freely, free from the shadows of mold.
Recent Posts
Top Storm Damage Assessment Strategies for Homeowners
After a storm, your home can look like it’s been through a war zone, with
Top Storm Damage Assessment Techniques for Homeowners
Many homeowners underestimate the extent of storm damage until it’s too late. It’s essential to
Budget-Friendly Smoke Damage Repair Techniques
When dealing with smoke damage, it’s essential to assess the extent of the impact on