Contents
When disaster strikes, restoring your home after flood damage can feel overwhelming. Before you can get back to normal, you need to systematically address the aftermath. From ensuring your safety and evaluating the damage to extracting water and preventing mold, each step is essential. Understanding the proper procedures will not only help you reclaim your space but also safeguard your investment. So, what’s the first step you should take in this intimidating process?
Key Takeaways
- Thoroughly assess and document all flood damage with photographs and notes for insurance claims and future reference.
- Ensure safety by turning off electricity and wearing protective gear while inspecting and cleaning affected areas.
- Remove standing water quickly using pumps and dehumidifiers, and monitor humidity levels to prevent further damage.
- Clean and sanitize all contaminated surfaces, disposing of any items that cannot be salvaged to inhibit mold growth.
- Develop a detailed restoration plan, outlining timelines and budgets, while engaging professionals for complex repairs as needed.
Assessing Flood Damage
When you’re faced with the aftermath of a flood, evaluating the damage is your first vital step. Start by thoroughly inspecting your property, noting all affected areas, including walls, floors, and personal belongings.
Take clear photographs for damage documentation—these will be indispensable when filing a claim with your flood insurance provider. Don’t overlook hidden spaces like basements or attics; water can seep into these areas, causing unseen damage.
Record details such as the extent of water exposure and any structural issues, as this information will support your claim. If you’re unsure how to proceed, consider consulting a professional who specializes in flood recovery.
They can help you assess damage accurately and guarantee you don’t miss anything vital. Remember, being meticulous now can save you time and stress later, making the restoration process smoother and more efficient. Your home deserves the best care as you move forward.
Ensuring Safety First
After evaluating the damage, your safety must take precedence before starting any repairs. Begin by following established emergency procedures to guarantee you and your loved ones are out of harm’s way. Check for hazards like downed power lines, unstable structures, or potential gas leaks. Always wear protective gear, such as gloves and masks, when handling contaminated materials.
Here’s a quick checklist to prioritize your personal safety:
| Safety Measure | Action Steps |
|---|---|
| Power Safety | Switch off electricity |
| Structural Integrity | Inspect for visible damage |
| Water Contamination | Avoid contact with floodwater |
| Personal Protective Gear | Wear gloves, masks, and boots |
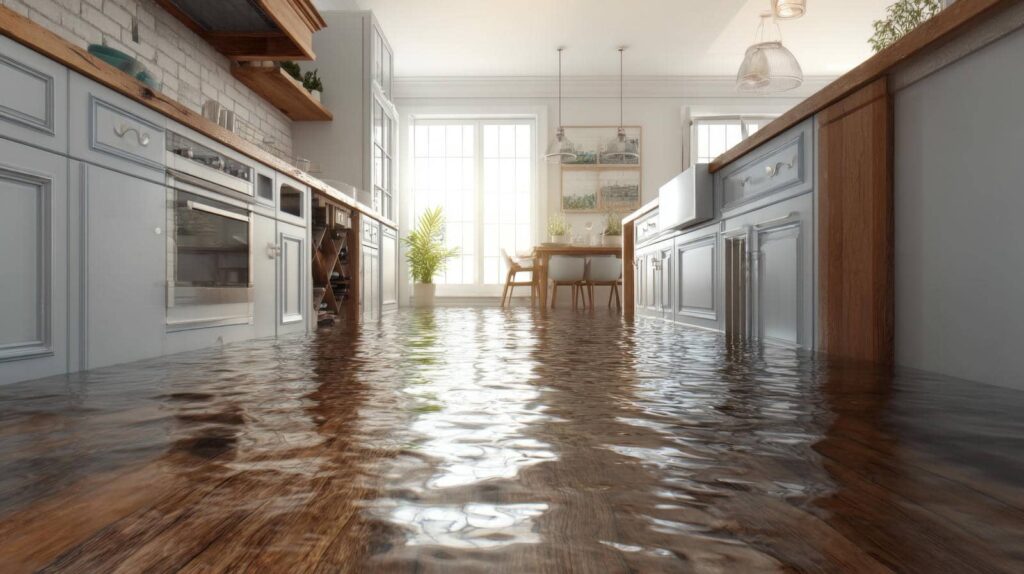
Water Extraction Techniques
Once you’ve secured safety and assessed the damage, it’s essential to begin water extraction as soon as possible to minimize further harm to your home.
You might want to start with sump pumps, which are important for removing standing water effectively. Position the pump in the deepest area of the affected space and make certain it’s powered safely to avoid electrical hazards.
Next, consider using water barriers to contain and redirect any remaining water, preventing it from spreading further into your home. These barriers can be temporary but play a significant role in controlling the situation.
As you extract water, keep an eye on the walls and floors for signs of damage, which can help you plan for repairs.
Drying and Dehumidification
Following the water extraction process, the next step involves drying the affected areas to prevent mold growth and further damage. You’ll want to utilize effective drying equipment, such as industrial fans and blowers, to circulate air and reduce moisture levels. This is essential in guaranteeing that all surfaces, including carpets and drywall, dry thoroughly.
In addition to airflow, consider implementing dehumidification methods. Dehumidifiers can considerably lower humidity levels, making the environment less conducive to mold and mildew. Monitor the humidity levels regularly to confirm they remain below 60%.
Keep windows closed during this process to maximize the effectiveness of your drying equipment and dehumidifiers.
Cleaning and Sanitizing Surfaces
After ensuring your home is thoroughly dried, it’s essential to assess contaminated areas to identify where cleaning is necessary.
You’ll want to use effective sanitizing solutions to eliminate any harmful bacteria or mold that could pose health risks.
Properly addressing these surfaces won’t only restore your home’s safety but also its livability.
Assessing Contaminated Areas
Flooding can introduce a variety of contaminants into your home, making it crucial to assess the affected areas thoroughly.
Begin by identifying all surfaces that came into contact with contaminated water, as these can pose significant health risks. Inspect walls, flooring, and furniture for signs of water damage or contamination.
Pay special attention to hidden spaces, like behind appliances or under carpets, where mold can thrive. Use a flashlight to check for discoloration or unusual odors, which can indicate deeper issues.
Document your findings with photos for insurance purposes. Remember, if you’re unsure about the level of contamination or the potential health risks, it’s wise to consult with a professional to guarantee your home is safe for you and your loved ones.
Effective Sanitizing Solutions
Once you’ve assessed the contaminated areas, it’s essential to move quickly to clean and sanitize surfaces to prevent further damage and health risks.
Using effective sanitizing solutions guarantees your home is safe for you and your loved ones. Here are some steps to follow:
- Use disinfecting agents like bleach or hydrogen peroxide for a thorough clean.
- Apply surface treatments to porous materials, ensuring they’re safe and effective.
- Scrub all surfaces with warm, soapy water before applying disinfectants.
- Allow surfaces to air dry completely to kill remaining pathogens.
- Dispose of any contaminated items that can’t be cleaned.
Repairing Structural Damage
After a flood, it’s essential to assess your home’s structural integrity to determine the extent of the damage.
Once you’ve identified affected areas, drying and dehumidifying these spaces will help prevent further deterioration.
Finally, you’ll need to decide whether to repair or replace any compromised materials to guarantee your home’s safety and stability.
Assessing Structural Integrity
While it’s easy to feel overwhelmed by the aftermath of water damage, evaluating the structural integrity of your home is an important first step in the restoration process.
Start by conducting thorough structural assessments and foundation evaluations. Here’s what to look for:
- Cracks in walls or ceilings
- Sagging or uneven floors
- Damage to load-bearing beams
- Signs of mold or rot
- Shifts in the foundation
Addressing these issues early can prevent further complications.
If you notice any of these signs, it’s vital to consult a professional. They’ll help determine the extent of the damage and recommend appropriate repairs.
Drying and Dehumidifying
To effectively combat the lingering effects of floodwater, you need to prioritize drying and dehumidifying your home as soon as possible.
Start by using high-quality drying techniques, such as fans and heaters, to circulate air and speed up evaporation.
Once surfaces are dry, select the right dehumidifier for your space; look for one with a capacity that matches your home’s square footage to efficiently remove moisture.
Remember, maintaining low humidity levels is essential to prevent mold growth and structural damage.
Regularly check and empty the dehumidifier to guarantee peak performance.
Repairing or Replacing Materials
Once you’ve successfully dried your home, addressing any structural damage caused by floodwaters becomes critical.
You’ll want to carefully evaluate the affected areas, deciding whether to repair or replace materials. Pay attention to your material selection and use effective renovation techniques to guarantee long-lasting results.
Here are some steps to guide you:
- Inspect beams and supports for warping or rot.
- Replace drywall and insulation that show signs of water damage.
- Choose water-resistant materials for areas prone to moisture.
- Reinforce any weakened floor joists or framing.
- Consult professionals for major structural repairs to guarantee safety.
Taking these steps not only restores your home but also helps cultivate a safe and welcoming environment for you and your loved ones.
Mold Prevention and Remediation
As you begin the process of restoring your home after flood damage, prioritizing mold prevention and remediation is essential to guarantee a safe and healthy living environment. Mold spores can thrive in damp conditions, so you’ll want to act quickly.
Start by thoroughly drying out your home within 24-48 hours to inhibit mold growth. Use dehumidifiers and fans to reduce humidity levels.
Implement prevention techniques by sealing any leaks in walls or roofs and ensuring proper ventilation in areas like basements and attics. Regularly inspect hidden spaces for moisture accumulation.
If you discover mold, don’t hesitate to act; wear protective gear and remove affected materials, or consider hiring professionals for extensive infestations.
Restoration and Renovation Planning
While maneuvering the aftermath of flood damage, creating an extensive restoration and renovation plan is essential for a successful recovery.
This plan not only helps you focus on immediate needs but also sets a clear path forward. Here’s how to get started:
Assess the Damage: Document affected areas and prioritize repairs.
Set a Restoration Timeline: Establish clear deadlines for each phase of the project.
Budget Considerations: Outline costs for materials, labor, and unexpected expenses.
Engage Professionals: Consult with contractors and specialists for expert guidance.
Stay Flexible: Be prepared to adapt your plan as you uncover new issues.
Frequently Asked Questions
How Long Does Flood Restoration Typically Take?
Flood restoration timelines vary, but typically, you can expect it to take a few days to weeks. First, a thorough water damage assessment is essential to determine the necessary steps and timeline for recovery.
Will My Insurance Cover Flood Damage Restoration?
Flood insurance frequently focuses on coverage limits, so it’s essential to check your policy. You’ll need to guarantee that it includes restoration costs, as not all plans cover every aspect of flood damage repair.
Should I Hire a Professional or DIY?
When deciding whether to hire a professional or DIY, consider the cost comparison and your skill assessment. If you lack experience, hiring someone might save you time and guarantee quality work, fostering peace of mind.
What Personal Items Can Be Salvaged After Flooding?
Did you know that 70% of personal items can be salvaged after flooding? Focus on photographs for recovery, and don’t forget about furniture cleaning—many pieces can be restored with proper care and effort.
How Can I Prevent Future Flooding in My Home?
To prevent future flooding in your home, guarantee proper drainage systems are installed and regularly maintained. Consider adding sump pumps in vulnerable areas to efficiently manage excess water and protect your living space from potential damage.
Summary
Restoring your home after flood damage can be overwhelming, but taking systematic steps makes the process manageable. By prioritizing safety, thorough cleaning, and effective repairs, you can greatly mitigate long-term risks. Stay organized with your restoration plan, and don’t hesitate to seek professional help when needed. Your home can be rejuvenated, ensuring a safe and comfortable environment for you and your family.
Recent Posts
Top Tips for Crawl Space Mold Remediation
Your crawl space can be a hidden jungle where mold thrives if not properly managed.
10 Best Crawl Space Mold Remediation Tips
Crawl space mold can lead to serious health issues and structural damage if not addressed
7 Tips for Successful Crawl Space Mold Remediation
Just as a ship can’t sail smoothly with a leaky hull, your home can’t remain