
Contents
When you spot a ceiling leak, you need to act fast or the damage can spread behind the surface. You’ll first stop the source, then check for sagging, stains, and hidden moisture before anything dries in place. Wet insulation, drywall, and mold risk can turn a small repair into a larger job quickly. The right sequence matters here, and the next steps can save you time, money, and structural trouble.
Key Takeaways
- Identify the leak source first, then stop water flow and protect the room with buckets, plastic sheeting, and moved furniture.
- Check for stains, bubbling paint, sagging drywall, soft spots, and cracks to judge the damage extent.
- Dry the area thoroughly using fans, open windows, and a dehumidifier before touching or repairing the ceiling.
- Remove moldy insulation or damaged drywall, then tape, mud, sand, prime, and repaint with stain-blocking primer.
- Call a professional for active dripping, repeated staining, wiring concerns, structural sagging, or musty odors.
Spot Ceiling Leak Damage
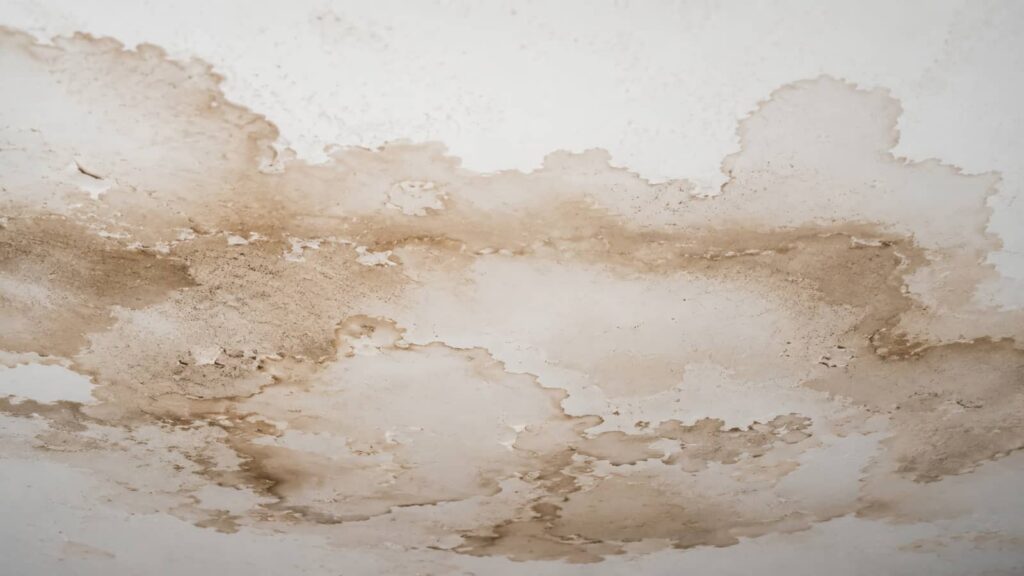
Before you repair a ceiling leak, you need to spot the damage accurately: look for water stains, bubbling or peeling paint, sagging drywall, discoloration, and soft or crumbling areas around the affected spot.
During a ceiling inspection, check the stain edges; fresh damage usually looks darker and spread in irregular rings. Press gently with a gloved hand to confirm whether the surface feels firm or spongy.
Mark every affected section so your spot repair stays focused and efficient. If the stain extends beyond the visible area, note the full perimeter and nearby seams, because moisture often travels before it shows.
You’re not guessing here—you’re building a clear repair map so you can work with confidence and keep your home looking solid.
Stop the Leak and Protect the Room
Once you’ve mapped the damage, stop the leak at its source so the repair doesn’t fail again; shut off the water supply if the leak comes from plumbing, divert runoff if it’s a roof issue, and call a pro if the source isn’t obvious or safe to access.
Protect the room next: move furniture, roll up rugs, and cover fixtures with plastic sheeting to keep moisture from spreading. Place buckets under active drips and use towels to catch splashback.
Run a fan and dehumidifier to control humidity while you work. If you can safely access the exterior, use temporary waterproofing techniques such as a tarp, flashing tape, or sealant to reduce further intrusion.
Good ceiling maintenance starts with fast containment, so your space stays cleaner, safer, and ready for the next repair step.
Inspect the Ceiling for Damage
Inspect the ceiling surface for water stains and any sagging areas, since both can indicate active moisture damage.
Check for cracks around joints, seams, and fasteners, because they can widen as the ceiling dries and shifts.
If you spot discoloration, deflection, or splitting, mark the affected areas so you can assess the repair scope accurately.
Check Stains and Sagging
Start with a close visual check of the ceiling surface for water stains, discoloration, peeling paint, and any sagging or bulging areas, since these signs often point to active moisture damage.
Use stain identification to map the affected area, noting edges, color shifts, and any dark rings that suggest repeated wetting. Touch the surface lightly only if it feels safe; soft spots can indicate saturated material.
For sagging prevention, monitor any section that looks bowed so you can act before the ceiling loses more integrity.
Compare adjoining areas to see whether damage is spreading, and keep your notes organized so you and your repair team stay aligned.
This careful inspection helps you catch problems early, reduce repair scope, and protect the room’s structure.
Look for Cracks
Next, look closely for cracks in the ceiling, because even fine lines can signal movement, moisture stress, or failing drywall tape.
You should map each crack’s length, width, and direction, then compare it with nearby stains or soft spots. Hairline cracks often point to drying compound, but wider gaps or spreading lines can mean ongoing leakage or reduced structural integrity.
If you see a crack that widens at joints, note it for repair before you patch anything. Use bright light and a pencil to mark endpoints for tracking.
This simple inspection supports crack prevention, helps you spot active damage early, and keeps your repair plan focused. If the ceiling flexes or the crack returns, call a qualified pro.
Dry the Ceiling Quickly
Get the ceiling dry as quickly as possible to limit staining, sagging, and mold growth.
Start with a moisture assessment so you know how far the leak spread and which areas need focused drying. Open windows if weather permits, and run fans to move air across the wet surface.
Use a dehumidifier to pull vapor from the room and keep humidity low. These drying techniques work best when you keep airflow steady and monitor progress every few hours.
If you notice bubbling paint or a soft spot, reduce stress on that section and avoid touching it more than needed.
You’ll protect your home faster when you act methodically, stay patient, and treat the damp ceiling like a shared problem your crew can solve together.
Remove Wet Insulation and Debris
Once the ceiling surface is dry enough to handle, remove any wet insulation and loose debris above the damage so trapped moisture doesn’t keep feeding mold or staining.
Wear gloves, a mask, and eye protection before you open the cavity. Pull out soaked batts, bag them immediately, and follow local insulation disposal rules so contaminated material doesn’t spread.
Use a vacuum or hand tools for careful debris removal, and clear nails, plaster crumbs, and wood fragments from the area.
Check adjacent insulation for dampness, too, because hidden moisture can keep the problem active.
Keep the cavity open and ventilated until all materials feel dry.
Fix Sagging or Stained Ceiling Drywall
You should inspect the ceiling drywall for sagging, soft spots, discoloration, and fastener failure to define the damaged area.
If the drywall has lost structural integrity, cut out the compromised section and replace it with new board matched to the existing thickness.
After installation, tape, mud, sand, and prime the repair so the surface is flat and the stain won’t bleed through.
Identify Ceiling Damage
A ceiling leak often leaves two clear warning signs: sagging drywall or brown, yellow, or rust-colored stains. You should inspect the area closely and note whether the damage spreads, softens, or darkens over time.
Press lightly near the mark; if the surface feels damp, brittle, or spongy, moisture is still active. Check nearby ceiling materials for cracking, bubbling paint, or separated seams, because these details help you pinpoint the affected zone.
Trace possible water sources above the room, including plumbing lines, roof penetrations, vents, or fixtures. You’re not guessing here—you’re building a clear map of the failure.
Document the location, size, and pattern so you can match the damage to the source and plan the right repair with confidence.
Repair Drywall Sagging
When the ceiling drywall sags, flexes, or stains but hasn’t fully collapsed, cut off the water source first and let the area dry completely before any patch work.
You can then probe the damaged area with a utility knife and remove any soft, swollen drywall back to solid framing. If insulation is wet, replace it.
Use drywall repair techniques: install backing strips, fit new drywall, tape joints, and apply setting compound in thin coats. Sand lightly between coats, then prime with a stain-blocking sealer and repaint.
For ceiling moisture management, inspect the source again and verify ventilation, flashing, and plumbing repairs.
You’re not alone in this process; careful prep and tight execution help you restore a safe, clean ceiling that blends with the room.
Remove Mold Safely After a Leak
After a ceiling leak, remove mold only after the area dries and you’ve fixed the moisture source, because lingering dampness will let growth return.
Identify mold types by color, texture, and spread: small surface patches often differ from deep, fuzzy colonies.
Wear gloves, goggles, and an N95 respirator, then isolate the workspace with plastic sheeting and ventilation.
For nonporous surfaces, scrub with detergent and water, then apply an EPA-registered cleaner; for porous materials that stayed wet too long, remove and discard them.
Don’t mix bleach with other chemicals.
Use HEPA vacuuming and damp wiping as removal methods to capture spores without spreading them.
Keep occupants out until cleanup ends.
If the stain covers a large area, call a qualified remediation team.
Restore Paint, Texture, and Drywall
Once the leak is fixed and the area is fully dry, you can restore the ceiling by replacing any weakened drywall, sealing stains, and rebuilding the surface texture before repainting.
Cut out soft material to sound edges, install matching drywall, and tape the seams with joint compound. Sand smooth, then apply a stain-blocking primer so old marks don’t bleed through.
For texture application, match the existing finish with a spray, roller, or trowel method, testing first on scrap. Let each coat dry fully before adding another.
When you choose paint, use a flat ceiling formula with strong hide and the right sheen for seamless blending.
Careful prep helps you feel confident, keeps the repair clean, and makes the ceiling look like it belongs there.
Prevent Future Ceiling Leaks
To prevent future ceiling leaks, inspect your roof, flashing, gutters, plumbing, and attic insulation on a regular schedule, because small defects usually cause the biggest problems.
You’ll reduce risk by clearing debris, sealing loose flashing, and confirming downspouts carry water away from your foundation.
In the attic, check for damp insulation, stains, and air gaps that can trap moisture.
Around fixtures, tighten connections and replace worn supply lines before they fail.
Keep a log of every finding so your preventive maintenance stays organized and your regular inspections remain consistent.
When you stay proactive, you protect your home, save repair costs, and join the group of homeowners who catch issues early.
Small, disciplined checks make your ceiling system stronger over time.
Call a Ceiling Repair Pro When Needed
If inspections show active dripping, a sagging ceiling, repeated staining, or moisture near wiring, you should bring in a ceiling repair pro before the damage spreads.
You’ll protect your home’s structure and your household’s safety by acting quickly. A professional assessment can identify hidden water intrusion, compromised drywall, damaged insulation, and electrical hazards that you might miss.
Your pro can isolate the source, recommend drying or replacement, and explain repair costs upfront, so you can plan without surprises.
If the ceiling has started to bow, crack, or smell musty, don’t wait for a collapse. Calling in a trusted specialist helps you get back to normal faster and keeps your space safe, dry, and ready for the people who live in it.
Frequently Asked Questions
What Causes Ceiling Leaks During Heavy Rain?
Heavy rain causes ceiling leaks when your roof maintenance fails, flashing cracks, shingles loosen, or drainage systems clog. You’ll often see water back up, then penetrate insulation, joints, and ceiling seams, causing interior damage.
How Long Does Ceiling Water Damage Repair Take?
You’re looking at a clock with hidden gears: repair timeframes usually range from 1 to 7 days, depending on damage. You’ll need drying processes, inspection, patching, and paint to restore your ceiling safely.
Can I Stay in My Home During Repairs?
Yes, you can stay home during repairs if the area’s contained, but you’ll need temporary relocation if there’s mold, electrical risk, or structural damage. Follow safety precautions, and your contractor’ll confirm what’s safest.
Will Homeowners Insurance Cover Ceiling Leak Damage?
Yes, your homeowners insurance may cover ceiling leak damage, if your insurance policy includes sudden, accidental water damage. You’ll need a leak assessment, documentation, and prompt reporting to help your claim and protect your home.
How Much Does Professional Ceiling Leak Repair Cost?
You’ll usually pay $300-$1,200 for professional ceiling leak repair, depending on damage size, materials, and labor. Cost factors drive repair estimates, so you’ll want a trusted contractor who explains scope, timelines, and options clearly.
Summary
Ceiling leak repair is like stopping a slow crack in a dam before it spreads. You need to spot the damage fast, stop the leak, dry the area, and remove any wet or moldy material. Then you can restore drywall, texture, and paint with confidence. Keep inspecting plumbing, roofing, and attic spaces so you catch problems early. If the damage looks structural or widespread, call a pro before the repair gets worse.
Recent Posts
How to Restore Water Damage After Flood
After a flood, you’re facing more than a little cleanup, and your first move is
7 Smoke Odor Removal Tips After Water Damage
Smoke odor after water damage can linger in places you’d never think to inspect first.
What Removes Odor After Water Damage?
After water damage, you need to remove the source of the smell, not just mask