
Contents
After a flood, you’re facing more than a little cleanup, and your first move is to treat the site as controlled damage. Water Damage After Flood should begin with assessing hazards, shutting off power and water, and removing standing water before drying materials with dehumidifiers and air movers. From there, clean and disinfect affected surfaces, inspect for mold, and plan necessary repairs. The real challenge comes next, when hidden moisture starts to determine what can be saved and what needs to be replaced.
Key Takeaways
- Assess safety first, document damage, and stop if you find mold, electrical hazards, or structural instability.
- Shut off water and electricity safely before entering flooded areas or touching submerged appliances.
- Remove standing water quickly, then dry floors and wall cavities with pumps, wet vacs, air movers, and dehumidifiers.
- Clean, disinfect, and inspect all affected surfaces for mold within 24 to 48 hours.
- Repair damaged materials and fix flood entry points to prevent future water damage.
Assess Safety and Flood Damage
Before you start cleanup, assess the area for immediate hazards and determine the extent of the flood damage. You’ll need to walk the perimeter first, noting unstable floors, sagging ceilings, sharp debris, and contaminated water.
Use safety precautions every time you enter a room: wear boots, gloves, and eye protection, and avoid contact with wet materials until you confirm they’re stable. Document every affected space with photos and written notes so your damage assessment stays organized and complete.
Check walls, baseboards, insulation, furniture, and stored items for saturation, staining, or swelling. If you detect mold, electrical arcing, or structural shifting, stop and get qualified help.
When you assess methodically, you protect yourself and support your household’s recovery as a team.
Shut Off Water and Power
Once you’ve confirmed the area is safe to enter, shut off the water supply at the main valve to stop additional flooding and limit further saturation. If your home has a local isolation valve, close it too for a complete water shutoff.
Next, switch off electricity at the breaker only if you can reach it without stepping in water; otherwise, call a licensed electrician. Power safety matters because wet wiring can energize floors, walls, and metal fixtures.
Unplug appliances with dry hands and keep everyone away from outlets, cords, and submerged equipment. If you’re working with neighbors or family, assign one person to verify each shutdown so nothing’s missed.
Clear communication and a steady checklist help your team stay coordinated, protect each other, and control the damage.
Remove Standing Water Fast
Now that the area is safe, remove standing water as quickly as possible to limit structural damage and mold growth. You should choose water extraction methods based on depth, debris, and access.
For shallow water, use wet vacuums; for deeper pools, use submersible or trash pump types. Position the pump at the lowest point, route discharge away from the structure, and monitor flow so you don’t recirculate water.
Work in sections and keep the path clear so your team can move efficiently and stay coordinated. If the water contains sediment, use strainers to reduce clogs.
Check hoses, cords, and fittings before starting, then verify that each pass leaves the surface visibly drier and safer for the next response step.
Dry Out Walls, Floors, and Contents
After you remove standing water, begin drying wall cavities and exposed floors with air movers and dehumidifiers to drive moisture out of hidden spaces.
You should open affected wall sections only as needed so you can verify drying, limit trapped moisture, and prevent secondary damage.
At the same time, sort wet contents by material and condition so you can salvage items that can dry safely and discard what you can’t restore.
Dry Wall Cavities
Open wall cavities as soon as possible to remove trapped moisture and prevent hidden mold growth, structural deterioration, and musty odors.
You’ll need to cut inspection openings, then verify that framing, insulation, and dry wall materials are exposed enough to air-dry thoroughly. Remove saturated insulation, and check moisture barriers for tears, bridging, or trapped water that can slow drying.
Set up directed airflow and dehumidification so each cavity reaches a safe moisture level before you close it. Measure moisture in studs and sheathing daily, and document readings to confirm progress.
You’re not alone in this process; following a disciplined sequence helps your whole restoration team work efficiently and safely.
Keep cavity surfaces clean, and replace damaged components only after they’re fully dry and stable.
Remove Standing Water
Remove standing water immediately so you can limit wicking, reduce structural damage, and speed the dry-out of walls, floors, and contents. Start water extraction with a wet vac, truck mount, or portable pump, and keep a sump pump running if the area still collects water. You’ll protect the structure best when you move methodically and check each room in sequence.
- Measure depth before you enter.
- Shut off power to flooded zones.
- Pull water from low spots first.
- Track progress until surfaces stay visibly dry.
After bulk water is gone, increase airflow with fans and dehumidifiers to support even drying. Inspect baseboards, carpet, and subfloors for trapped moisture, and keep documenting conditions so your team can stay coordinated and confident.
Salvage Wet Contents
Once standing water is out, you can salvage wet contents by sorting items by material, drying speed, and contamination level, then moving the most recoverable pieces to a clean, ventilated area.
You’ll protect your progress by handling porous items, furniture, and textiles separately from nonporous surfaces. Open cabinets, remove cushions, and elevate belongings on blocks or racks.
Use fans and dehumidifiers to keep air moving, but don’t overheat fragile materials. To restore documents, interleave plain paper and flatten pages under light weight.
To salvage electronics, disconnect power, remove batteries, and dry components only after inspecting for mud or corrosion. Label each item, note damage, and discard anything sewage-soaked or structurally unstable.
Work steadily, and you’ll keep your space organized, safer, and easier to recover.
Clean and Disinfect Flooded Surfaces
Remove all mud and debris from the flooded surfaces first, using tools that let you lift material without spreading contamination.
Then wash the area with a detergent solution to remove residue and organic film.
After cleaning, disinfect the surfaces with a bleach solution at the proper dilution and contact time.
Remove Mud And Debris
Start by shoveling out mud, silt, and loose debris before the residue dries and hardens on floors, walls, and fixtures. You’ll move faster if you work from the highest settled layer down, using mud removal techniques that keep you from spreading contamination.
Keep your team aligned by clearing one zone at a time and bagging waste as you go. Follow approved debris disposal methods so nothing reenters the home.
- Scrape compacted deposits with a plastic shovel.
- Lift saturated trash into heavy-duty bags.
- Rinse tools between rooms to limit transfer.
- Inspect corners, drains, and seams for hidden buildup.
Stay methodical, because precise removal protects the space you’re rebuilding and helps your household feel connected to the recovery effort.
Wash With Detergent
Mix a manufacturer-approved detergent with warm water, then wash flooded surfaces from top to bottom so loosened soil doesn’t drip onto cleaned areas. You’ll get better control by working in small sections and changing solution when it turns cloudy.
Choose detergent types suited to the material: neutral formulas for painted walls, stronger degreasers for hard, nonporous floors. Use washing techniques that lift residue without saturating drywall, insulation, or wood framing.
Agitate with a soft brush, then wipe with clean cloths and fresh water as needed. Keep tools organized so you and your team move efficiently and stay on the same plan.
After each section, inspect for film, stains, and hidden grime before you continue to the next area.
Disinfect With Bleach
After washing, disinfect nonporous flood-affected surfaces with a diluted bleach solution to reduce microbial growth and sanitize remaining contamination.
Mix 1 cup household bleach per 5 gallons water, then test a small area first. You’ll protect your space and support your team’s recovery when you follow bleach safety exactly.
Use these application methods:
- Apply the solution with a clean mop, cloth, or pump sprayer.
- Keep surfaces visibly wet for 10 minutes.
- Rinse with clean water after contact time.
- Open windows and wear gloves and eye protection.
Never mix bleach with ammonia or acids, and discard solutions after use.
Let the area air-dry completely before you replace items or begin repairs.
Inspect for Mold Growth
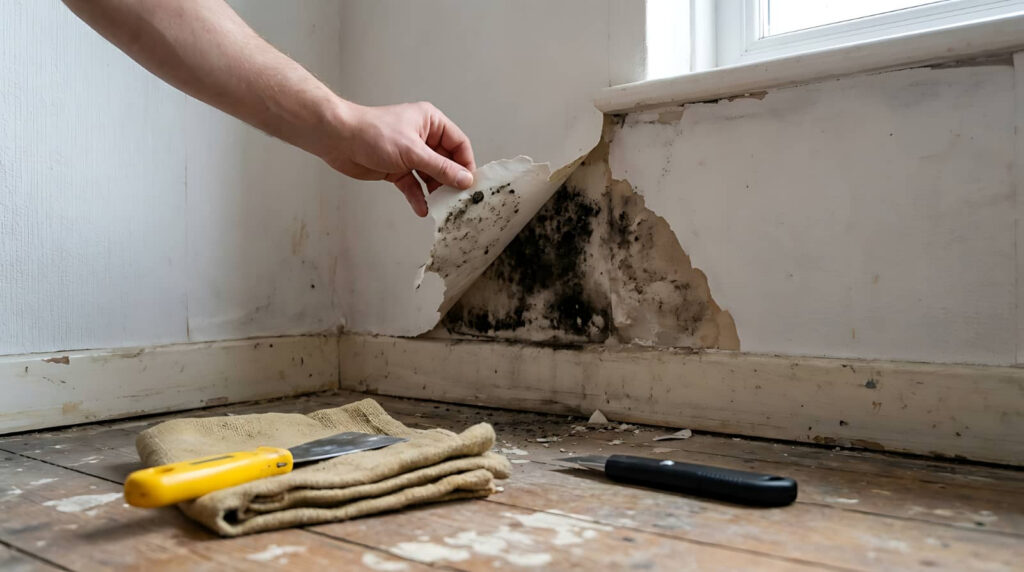
Before you begin repairs, inspect every affected surface for mold growth, since moisture trapped in walls, flooring, and insulation can trigger contamination within 24 to 48 hours.
You should check baseboards, drywall seams, window trim, and hidden cavities with a flashlight and moisture meter. Look for discoloration, fuzzy patches, musty odors, and warped materials.
Use inspection techniques that let you document each finding with photos and notes, so your team can track progress and stay coordinated.
If you spot growth, isolate the area and keep humidity low to support mold prevention. You don’t need to remove intact materials yet; focus on identifying the full extent of contamination.
Work methodically, stay alert, and you’ll protect the space and everyone who relies on it.
Repair Flood-Damaged Ceilings and Flooring
Once the structure is dry and mold-free, you can start repairing flood-damaged ceilings and flooring by removing any sagging, stained, or delaminated materials. You’ll belong to the group of owners who restore rooms with measured, careful work.
Cut back damaged drywall to solid edges, then install matching patches, tape joints, and finish seams for ceiling repair. In flooring replacement, lift swollen boards, underlayment, or carpet padding, then confirm the subfloor is stable and level. Match new materials to existing thickness and species where possible.
- Score and remove weak sections cleanly.
- Fasten repairs to sound framing or joists.
- Seal seams with the correct compound.
- Sand, prime, and refinish surfaces after curing.
Prevent Future Flood Damage
To reduce the risk of another flood, you should identify how water entered the structure and correct every weak point in the envelope and drainage system.
Inspect grading, gutters, downspouts, foundation joints, utility penetrations, and window wells, then seal or upgrade each one.
Add sump pumps with battery backup, backflow valves, and properly sized drainage systems to move water away from the slab.
Install flood barriers at doors, vents, and low openings where runoff concentrates.
Keep landscaping sloped outward and maintain clear discharge paths.
You should also document maintenance, test equipment seasonally, and replace worn seals before storm season.
When you work methodically, you protect your home and join a community of owners who prepare early and recover faster.
Frequently Asked Questions
How Long Should Insurance Claims Take After Flood Damage?
You’re typically waiting days to weeks for an insurance claim duration after flood damage; your flood damage assessment, documentation, and carrier workload drive it. You can speed review by submitting complete evidence and following up regularly.
Can I Keep Appliances Exposed to Floodwater?
No, you shouldn’t keep appliances exposed to floodwater; it compromises appliance safety and slows flood recovery. You should disconnect power, document damage, and have a qualified technician inspect each unit before you reuse it.
What Documents Should I Photograph for Flood Insurance?
Photograph every ruined item, room, appliance, serial number, and repair receipt—because floods love paperwork. You’ll build strong flood documentation for insurance tips, capturing wide shots, close-ups, and date stamps so you’ve got proof.
When Should a Structural Engineer Inspect My House?
You should call a structural engineer immediately if you see foundation cracks, sagging floors, shifted walls, or after any major flood. They’ll set your inspection timeline, confirm foundation stability, and help you feel secure.
Are Personal Belongings Covered After a Natural Flood?
Not usually; you’ll need flood insurance to cover personal property after a natural flood. You should review your policy’s limits, exclusions, and deductibles carefully, then document losses promptly and file your claim fast.
Conclusion
You can restore flood damage faster when you act methodically. First, verify safety, then shut off power and water, remove standing water, dry every surface, and disinfect contaminated areas. Next, inspect closely for mold and repair damaged ceilings, floors, and contents. You may think prevention is optional after cleanup, but it isn’t; sealing leaks and improving drainage reduce repeat loss. Use this process to restore your space and protect it from future flooding.
Recent Posts
5 Steps for Flood Water Recovery
When floodwater enters your space, you need to act in a strict sequence. Flood Water
7 Smoke Odor Removal Tips After Water Damage
Smoke odor after water damage can linger in places you’d never think to inspect first.
What Removes Odor After Water Damage?
After water damage, you need to remove the source of the smell, not just mask