Contents
Sewage damage cleanup is often more complex than it appears, and improper handling can lead to serious health risks. It’s vital to follow a systematic approach to ensure safety and effectiveness. By understanding the seven best practices, you can mitigate risks and restore the affected area properly. Let’s explore these essential steps to ensure a thorough and safe cleanup process.
Key Takeaways
- Conduct a thorough damage assessment to identify affected areas and establish safety protocols for sewage exposure risks.
- Utilize appropriate personal protective equipment (PPE) such as gloves, boots, and masks during cleanup operations.
- Seal off contaminated areas with plastic sheeting and create a decontamination zone for entering and exiting.
- Remove all contaminated materials carefully, disposing of them in heavy-duty sealed bags according to local regulations.
- Implement long-term moisture control practices, including dehumidifiers and regular inspections to prevent mold growth.
Assess the Damage and Ensure Safety
Before you begin any cleanup efforts, it’s essential to evaluate the damage and ensure safety. Start with a thorough damage appraisal to identify affected areas and materials. Look for signs of structural compromise, contaminated surfaces, and potential hazards. Document your findings meticulously, as this will guide your cleanup approach.
Next, establish safety protocols. Ensure that all individuals involved in the cleanup comprehend the risks associated with sewage exposure. Communicate clearly about the potential for harmful pathogens and hazardous materials.
Create a designated zone for cleanup activities, limiting access to unauthorized personnel. Utilize appropriate tools and resources to maintain a safe environment, including secure storage for contaminated items.
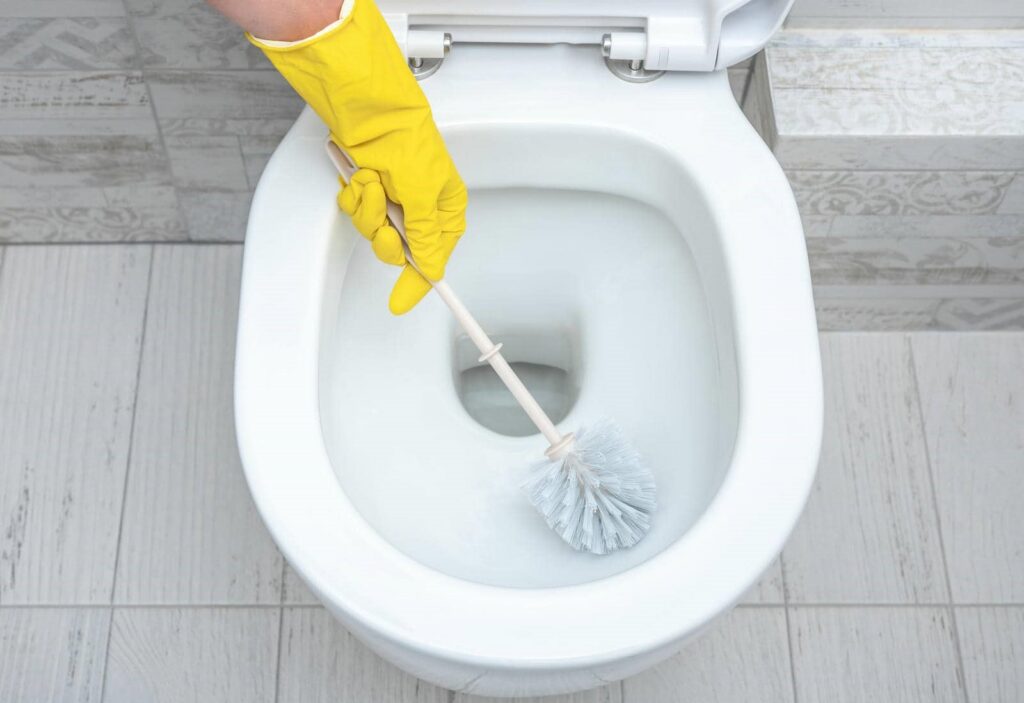
Wear Personal Protective Equipment (PPE)
After evaluating the damage and ensuring safety measures are in place, the next step is to focus on wearing Personal Protective Equipment (PPE). Proper PPE is vital in protecting you from harmful pathogens and contaminants present in sewage.
Start with gloves—nitrile or latex—designed to resist punctures and chemicals. Wear waterproof boots to prevent exposure to contaminated water, as well as coveralls made of durable materials. Don’t forget a face mask or respirator to shield your respiratory system from airborne pathogens.
When selecting PPE types, confirm they meet relevant safety protocols for sewage cleanup. Always check for proper fit and functionality; ill-fitting gear can compromise your safety.
Equip yourself with goggles to protect your eyes from splashes. Following these practices safeguards your health and fosters a culture of safety within your team, creating a supportive environment where everyone can work confidently.
Contain the Affected Area
To effectively manage sewage damage, you must first contain the affected area to prevent further contamination.
Begin by sealing off entry points to the contaminated space. Use plastic sheeting to isolate the area and prevent the spread of harmful pathogens.
Next, employ containment strategies such as creating a decontamination zone at the entrance, where you can remove contaminated footwear and gear.
Ensure proper ventilation to minimize odor and moisture buildup while keeping the air quality manageable.
Utilize air scrubbers equipped with HEPA filters to capture airborne contaminants.
If possible, divert foot traffic away from the affected area to limit exposure to harmful substances.
Remove Contaminated Materials
Before removing contaminated materials, assess the extent of the damage to determine what needs to be discarded.
Always wear appropriate protective gear to safeguard yourself from harmful pathogens.
Finally, ensure proper disposal of all contaminated materials in accordance with local regulations to prevent further contamination.
Assess Damage Extent
Evaluating the extent of sewage damage is essential for effective cleanup and restoration.
Start with a thorough damage evaluation to identify contaminated areas, including flooring, walls, and insulation. Document the severity and type of damage, as this will guide your removal process.
Follow established safety protocols to protect yourself and others during this phase. Remove any materials that show signs of contamination, such as drywall, carpeting, and personal belongings, ensuring to dispose of them properly.
This step prevents health risks and helps in restoring the space efficiently. By methodically evaluating and removing affected materials, you set a solid foundation for the subsequent stages of cleanup and recovery, fostering a safe and welcoming environment for everyone involved.
Wear Protective Gear
After identifying and documenting the extent of sewage damage, the next step is to prioritize safety by wearing appropriate protective gear.
You’ll need high-quality protective clothing, including gloves, masks, and waterproof boots, to shield yourself from harmful contaminants. Make certain your gloves are long enough to protect your forearms, and choose masks with proper filtration to guard against airborne pathogens.
Safety equipment, such as goggles, can prevent splashes from reaching your eyes. It’s essential to wear this gear throughout the cleanup process, as sewage can contain dangerous bacteria and viruses.
Dispose Properly
Once you’ve assessed the damage, it’s essential to remove contaminated materials promptly and safely.
Begin by identifying all items affected by sewage, including carpets, drywall, and furniture. These materials often qualify as hazardous waste and require careful handling. Use heavy-duty plastic bags for disposal, ensuring they’re sealed tightly to prevent leaks.
Next, contact your local waste management authority to understand regulations regarding sewage disposal. Some areas have specific guidelines for disposing of hazardous waste, and it’s vital to follow them to protect your community and the environment.
Don’t forget to document the disposal process, as this may be necessary for insurance claims. By adhering to these practices, you’ll contribute to a safe and healthy environment for everyone.
Clean and Disinfect Surfaces
As you begin the process of cleaning and disinfecting surfaces affected by sewage damage, it’s crucial to equip yourself with the right tools and materials. Gather heavy-duty cleaning agents designed for biohazard situations—look for those that specify effectiveness against bacteria and viruses.
Start by wearing protective gear, including gloves and masks, to ensure your safety. Remove any debris and visible contaminants from the surfaces.
Next, apply your chosen cleaning agent liberally, allowing it to sit for the recommended dwell time to ensure effective sanitization. Afterward, scrub the surfaces thoroughly, focusing on high-touch areas like doorknobs and countertops.
Rinse the surfaces with clean water to remove any residue from the cleaning agents. Finally, use an appropriate disinfectant to achieve thorough surface sanitization, ensuring all pathogens are effectively neutralized.
This methodical approach helps create a safe environment for everyone in your space.
Dry the Area Thoroughly
With surfaces now clean and disinfected, the next step is to dry the area thoroughly to prevent further contamination and mold growth.
Start by utilizing dehumidifiers to extract moisture from the air. Place them strategically in affected spaces, ensuring they run continuously until humidity levels drop considerably. Monitor the humidity with a hygrometer to achieve ideal results.
In addition to dehumidifier usage, employ effective ventilation techniques. Open windows and doors where possible to enhance airflow. Use fans to circulate air, directing them towards damp areas.
This combination of dehumidification and ventilation will expedite the drying process, creating an environment less conducive to mold.
Monitor for Mold Growth
Monitoring for mold growth is essential after sewage damage cleanup, as even minor moisture remnants can lead to significant mold issues. To effectively manage this risk, you should implement mold prevention strategies immediately. Start by ensuring all surfaces are completely dry and ventilated.
Regularly inspect high-humidity areas, such as bathrooms and basements, where mold is likely to thrive. Utilize mold testing methods, like air sampling or surface swabs, to detect any hidden spores. If you notice any signs of mold, act quickly; use appropriate cleaning solutions and methods to eliminate it.
Consider investing in a dehumidifier to maintain ideal indoor humidity levels. Engaging with professionals for thorough inspections can also enhance your mold prevention efforts.
Wrap-Up
Following these seven best practices for sewage damage cleanup ensures your safety and effectively mitigates risks associated with contamination. By evaluating the damage, wearing proper PPE, and containing the affected area, you set a solid foundation for successful remediation. Cleaning, disinfecting, and thoroughly drying the space prevents further complications, while regular monitoring for mold growth keeps potential issues at bay. Adhering to these steps helps you restore your environment to a safe, healthy state.
Recent Posts
Ultimate Guide to Storm Damage Restoration Techniques
After a severe storm last year, many homeowners found themselves facing extensive water damage and
Top 5 Storm Damage Restoration Strategies Explained
Storms can wreak havoc on properties, yet effective damage restoration strategies can mitigate the damage.
3 Best Storm Damage Assessment Techniques for Homeowners
Storm damage can often be deceptive, with some issues lurking beneath the surface, unnoticed until