Contents
It’s interesting how many people underestimate the importance of proper sewage cleanup and mold removal until they’re faced with the situation. When you find yourself dealing with sewage issues, knowing the best steps to take can make all the difference. From evaluating damage to preventing future growth, each step is vital. Let’s explore these essential procedures to ensure you handle the situation effectively and safely.
Key Takeaways
- Conduct a thorough assessment of damage and identify the source of sewage contamination before initiating cleanup efforts.
- Use proper protective gear, including gloves, masks, and coveralls, to safeguard against harmful pathogens during cleanup.
- Remove contaminated materials like carpets and drywall, sealing them in heavy-duty bags for safe disposal.
- Clean and disinfect all surfaces with EPA-approved solutions, ensuring proper contact time for effective microbial reduction.
- Implement mold prevention strategies, such as controlling humidity and using mold-resistant materials, after cleanup is complete.
Assess the Damage and Safety Hazards
Before you begin any sewage cleanup, it’s vital to assess the damage and identify safety hazards.
Start with a thorough damage assessment to determine the extent of contamination. Look for areas affected by sewage, noting the type of materials involved, such as carpets, drywall, and furniture. Each material requires a different approach for cleanup and disposal.
Next, conduct a safety evaluation. Check for potential hazards, including electrical risks and structural issues.
It’s important to confirm that the area is stable and that any exposed wiring or plumbing is addressed before proceeding. Wear appropriate protective equipment, as you’ll encounter harmful pathogens and chemicals during cleanup.
Gather Necessary Protective Gear
After evaluating the damage and identifying safety hazards, gathering the right protective gear is the next step in sewage cleanup.
Start by obtaining durable protective clothing, such as coveralls or rubber boots, to shield yourself from hazardous materials. Make certain you wear gloves made from a puncture-resistant material, as these will protect your hands from contaminants.
Safety glasses or goggles are essential for eye protection, especially if there’s a risk of splashes.
Don’t forget a face mask or respirator, which is critical for filtering out harmful particles and odors. Depending on the severity of the situation, consider additional safety equipment, like hard hats or knee pads.
Each piece of gear plays an essential role in minimizing health risks during the cleanup process. Equip yourself properly, and you’ll enhance your safety and foster a sense of community by encouraging others to prioritize their well-being during such tasks.
Contain the Affected Area
To effectively contain the affected area, you need to seal off contaminated zones to prevent further exposure.
Use plastic sheeting to create barriers that isolate these areas, ensuring no cross-contamination occurs.
Establish clear signage to inform others of the hazards and restrict access to the contaminated zones.
Seal Off Contaminated Zones
When dealing with sewage contamination, sealing off contaminated zones is vital to prevent the spread of harmful pathogens and mold spores.
Start by using effective isolation techniques to create barriers around affected areas. This may involve shutting doors and windows or utilizing tape to seal off openings.
Consider employing ventilation methods to manage airflow, ensuring that contaminated air doesn’t escape into clean spaces.
It’s essential to communicate with everyone involved, so they understand the importance of these measures.
By taking these steps, you protect yourself and create a safer environment for everyone around you.
Remember, thorough containment minimizes health risks and supports a more efficient cleanup process.
Prioritize safety and make sure everyone stays informed throughout the procedure.
Use Plastic Sheeting
Following the sealing of contaminated zones, the next step is to use plastic sheeting to further contain the affected area.
Plastic sheeting offers several benefits, such as preventing cross-contamination and reducing airborne particles. To install, measure the area you need to cover and cut the plastic sheets accordingly. Use duct tape to secure the edges, ensuring a tight seal.
Overlap seams by at least 12 inches to enhance containment. If working in high-traffic areas, consider adding weighted barriers at the bottom to keep the sheeting in place.
Establish Clear Signage
Establishing clear signage is essential for effectively containing the affected area during sewage cleanup and mold removal. Proper signage serves a dual purpose: it communicates the hazards present and helps maintain safety for you and others.
By marking off restricted zones with visible signs, you emphasize the signage importance in preventing unauthorized access. Use simple, direct language and universally recognized symbols to enhance effective communication.
Ensure that signs are placed at all entry points and are easy to read from a distance. This proactive step safeguards individuals and fosters a sense of community responsibility.
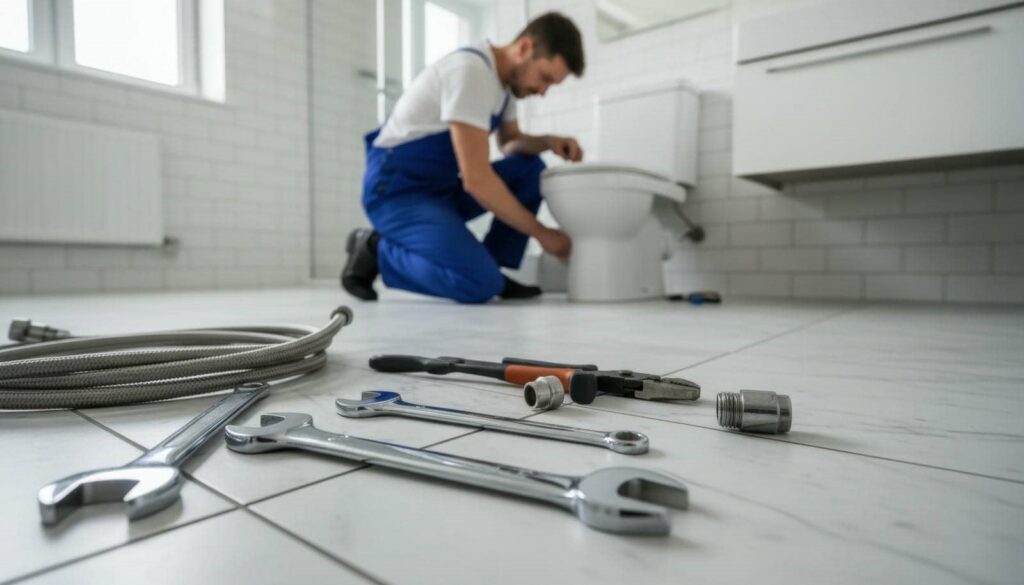
Remove Contaminated Materials
Removing contaminated materials is crucial in the aftermath of sewage exposure to prevent further health risks and structural damage.
Start by identifying items such as carpets, drywall, insulation, and furniture that have absorbed sewage. Use effective removal techniques, such as cutting out contaminated sections of drywall and rolling up carpets for disposal. Make sure you’re wearing appropriate personal protective equipment (PPE) during this process.
For disposal methods, place contaminated materials in heavy-duty plastic bags and seal them tightly to avoid leakage. Label the bags clearly to inform others of the contents.
Check local regulations regarding hazardous waste disposal, as some materials may require specific handling. After all contaminated items are removed, verify the area is clear to facilitate the next steps in your cleanup.
Clean and Disinfect Surfaces
Once you’ve cleared out the contaminated materials, it’s time to clean and disinfect the affected surfaces thoroughly. Start by using appropriate cleaning techniques, such as scrubbing with a stiff brush and a mixture of warm water and detergent. This initial step helps to remove visible debris and reduces the microbial load.
Next, choose suitable disinfectant options that are effective against bacteria and viruses. Look for EPA-approved products specifically designed for sewage cleanup. Follow the manufacturer’s instructions for dilution and application. Ascertain you cover all surfaces, including walls, floors, and any items that may have come into contact with sewage.
Allow the disinfectant to sit for the recommended contact time to maximize effectiveness. Afterward, rinse surfaces with clean water to remove any residue.
This meticulous process helps ascertain a safe, clean environment for you and your loved ones, promoting a sense of security and belonging in your space.
Dry the Area Thoroughly
To ensure effective mold prevention and maintain a safe environment, you must dry the area thoroughly after cleaning. Start by removing any standing water using a wet/dry vacuum or absorbent materials.
Once the bulk of the moisture is gone, employ ventilation techniques to enhance air circulation. Open windows and doors if weather permits, and use fans or dehumidifiers to expedite the drying process.
Moisture control is essential; aim for a relative humidity level below 60% to deter mold growth. Monitor the area closely for any signs of dampness, and continue drying until surfaces feel completely dry to the touch.
Prevent Future Mold Growth
Although you’ve taken steps to clean up sewage and eliminate moisture, preventing future mold growth requires ongoing vigilance and proactive measures.
Start by choosing mold resistant products for your home, especially in areas prone to dampness, like bathrooms and basements. These materials can greatly reduce the likelihood of mold taking hold.
Next, focus on ventilation improvements. Make sure that your home has adequate airflow, especially in high-humidity areas. Installing exhaust fans in kitchens and bathrooms helps remove moisture-laden air.
Regularly check and clean these systems to maintain their effectiveness.
Additionally, keep your indoor humidity levels below 60%. Use dehumidifiers if necessary.
Regularly inspect your home for leaks or water damage, as these can foster mold growth.
Summary
In sewage cleanup and mold removal, following these seven steps is essential to restoring your space to a safe environment. Think of this process as a well-orchestrated symphony; each step plays an important role in achieving harmony and safety. By evaluating damage, wearing protective gear, and ensuring thorough cleaning and drying, you’re not just addressing the immediate issue—you’re fortifying your home against future mold threats. Regular inspections will help maintain this delicate balance, safeguarding your health and property.
Recent Posts
Top Techniques for Effective Smoke Damage Cleanup
When faced with smoke damage, it’s vital to assess the extent of the harm before
Key Actions for Smoke Damage Recovery
After a fire in your home, the lingering smoke damage can be overwhelming. You need
Steps for Restoring Smoke Damage in Your Home
When faced with smoke damage in your home, it’s vital to follow a systematic approach.