
Contents
You notice a ceiling stain the same day a drip starts, and that coincidence matters more than it seems. Ceiling Leak Water Damage Mold Repair starts with stopping the leak, protecting the room, and tracing the source before hidden damage spreads. Then you’ll check for mold, dry the affected area quickly, and determine what can be cleaned, repaired, or safely replaced. Handling each step in the right order can help prevent recurring moisture problems and more costly repairs.
Key Takeaways
- Stop the leak immediately, protect belongings, and collect dripping water to limit further ceiling damage.
- Find the source by checking plumbing, roof, attic insulation, and water-stain patterns.
- Inspect for hidden moisture, mold growth, sagging drywall, and other structural damage.
- Dry the area quickly with fans, dehumidifiers, and ventilation before repairs begin.
- Remove mold and damaged materials safely, then monitor for recurring moisture or call a pro for large infestations.
Stop the Ceiling Leak and Protect the Area
Before you do anything else, stop the leak at its source if you can do so safely, then protect the area below.
Move furniture, electronics, and rugs out of the wet zone, and cover anything you can’t move with plastic sheeting. Place buckets under active drips and use towels to catch runoff.
If water is pooling on the ceiling, poke a small drain hole only if the material is sagging and you’re certain it’s stable; this can prevent a larger collapse. Shut off power to affected fixtures if moisture is near wiring.
Your next priority is area protection, which limits damage and keeps the space safer for everyone. Good leak prevention starts with quick, careful containment while you prepare for the next steps.
Find the Leak Source
Start by checking nearby plumbing for drips, loose fittings, and damp connections that could be feeding the ceiling leak.
Next, inspect the roof and attic for missing shingles, damaged flashing, wet insulation, or active water entry points.
Then trace the water stains carefully to map the leak path, since the visible damage often sits away from the actual source.
Check Nearby Plumbing
Inspect nearby plumbing first, since a leaking pipe often sends water to the ceiling long before it shows visible damage below.
You should trace supply lines, drain connections, and fittings above the affected area, using a flashlight and dry cloth. During pipe inspection, look for corrosion, loose joints, sweating, and mineral deposits that signal active seepage.
Run each fixture briefly, then watch for drips or dampness at elbows, valves, and trap seals. If you find a suspect connection, tighten it carefully or shut off the water and call a licensed plumber.
Consistent plumbing maintenance helps you protect your home and stay confident while you work with the team of people who care about safe repairs.
Inspect Roof And Attic
If the nearby plumbing checks out, move above the ceiling and trace the leak path through the roof and attic. Use a flashlight to inspect rafters, sheathing, and insulation for dampness, rust, or darkened wood.
Look for missing shingles, lifted flashing, clogged valleys, and fastener holes that can let water enter during rain. Check attic ventilation, since trapped humidity can mimic leak damage and worsen hidden moisture.
If you see mold, soft wood, or active dripping, mark the area and keep your footing safe. Good roof maintenance helps your whole home team stay ahead of problems, and you’re doing the right thing by verifying the source before repairs begin.
Don’t disturb the area more than needed; careful inspection gives you a reliable starting point.
Trace Water Stains
Follow the water stains to map the leak’s true path, because the visible spot on the ceiling isn’t always the entry point. You should inspect the stain’s edges, color shift, and spread direction to perform accurate water stain identification.
Darker rings often mark repeated wetting, while yellow or brown halos can point to slow seepage. Trace the line upward to framing, pipes, vents, or roof penetrations, and note any insulation that feels damp.
Use a flashlight and, if needed, moisture meter readings to confirm hidden travel. When you find the source, you can choose the right ceiling repair techniques and stop the damage before it grows.
You’re not alone in this process; careful tracing gives you control and a clear next step.
Inspect for Mold and Hidden Damage
Now you should check the ceiling cavity and surrounding materials for hidden moisture, since trapped water can spread beyond the visible stain.
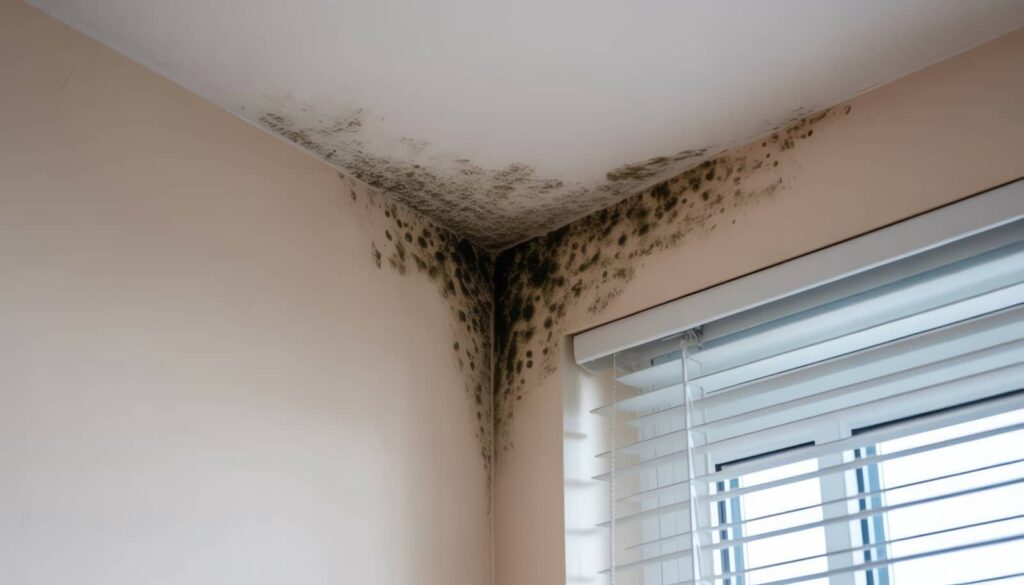
Look closely for mold growth, including discoloration, musty odor, or soft surfaces, and note any areas that need cleaning or remediation.
You’ll also want to assess structural damage by testing for sagging, weakened drywall, or compromised framing before you begin repairs.
Check Hidden Moisture
After you stop the visible leak, inspect the surrounding area for hidden moisture, because water often spreads beyond the stained spot and seeps into insulation, drywall, and framing.
Use moisture detection tools, such as a pinless meter or thermal camera, to map damp zones accurately. Check baseboards, attic edges, light fixtures, and adjacent cavities for hidden leaks that may keep feeding the damage.
Press on materials to feel for softness, swelling, or coolness, and mark any suspect areas for follow-up.
Dry the space with ventilation and dehumidification, but keep checking until readings return to normal.
This careful process helps you protect your home, reduce repair scope, and stay confident that the problem is truly under control.
Look For Mold Growth
Once you’ve confirmed the hidden moisture is being removed, inspect the area for mold growth and related damage before you close anything back up.
Use mold identification techniques such as visual checks, odor detection, and a flashlight to scan seams, insulation, and backing materials. Look for discoloration, fuzzy patches, or staining around fasteners and joints.
Common mold types in leak zones often include Aspergillus, Cladosporium, and Stachybotrys, but you shouldn’t try to identify species by appearance alone.
If you notice concentrated growth, document it and keep the space isolated so you and your household stay protected.
You’re not overreacting by checking carefully; you’re following the same disciplined process professionals use to keep repairs clean, safe, and complete before restoration begins.
Assess Structural Damage
With the area still exposed, you can assess whether the leak has damaged more than just the surface finish by checking the ceiling framing, drywall, insulation, and fasteners for sagging, soft spots, staining, or corrosion.
This material assessment tells you if hidden moisture has reduced structural integrity or if you can proceed with targeted repairs.
- Probe joists and trusses for deflection.
- Press drywall for crumbling, delamination, or flex.
- Inspect insulation for compression, odor, and moisture.
- Check screws, nails, and plates for rust or looseness.
If you find rot, mold, or warped members, document it and bring in a qualified contractor.
You’re not overreacting; you’re protecting your home and the people who live there with you.
Dry the Ceiling Fast
Speed matters when you’re drying a ceiling after a leak, because trapped moisture can keep spreading damage and raise the risk of mold.
You should open windows if weather allows, then run fans to move air across the wet surface. Use a dehumidifier nearby to pull humidity down and support moisture control.
If the ceiling has a small access point, gently increase airflow into the cavity, but don’t force heat into weakened materials. Blot visible water with clean towels, and keep checking the area for cooler, damp spots.
These drying techniques work best when you stay consistent for several hours. You’re not handling this alone; steady airflow and humidity reduction can help your ceiling recover safely and prepare it for the next repair step.
Remove Mold From Ceiling Materials
If you spot mold on ceiling materials after a leak, remove it promptly so it doesn’t keep spreading or weaken the surface further. You can use proven mold removal techniques suited to the affected ceiling material types, but test a small area first. Stay calm; you’re handling a common restoration step.
- Wear gloves, goggles, and a respirator.
- Ventilate the room to reduce airborne spores.
- Apply a cleaner matched to the material, then scrub gently.
- Wipe residue with clean cloths and dry the area fully.
For porous ceiling material types, replace sections that stay stained or soft. For hard surfaces, repeat cleaning until the finish looks stable.
When you work methodically, you protect your space and keep your home feeling safe, familiar, and cared for.
Repair Ceiling Damage Safely
Once the mold is removed and the ceiling is fully dry, you can start repairing the damaged area safely.
Put on protective gear, including gloves, goggles, and a respirator, and keep the workspace ventilated.
Cut away loose drywall, then inspect the framing for soft spots or corrosion. If you find compromised sections, replace them with new material cut to fit cleanly.
Use safety precautions when handling tools overhead, and support any damaged edges so they don’t crumble further.
Secure the replacement panel with proper fasteners, then tape and mud the seams in thin, even coats.
Sand lightly between coats for a smooth finish.
When you work carefully, you protect your home and stay confident in every repair.
Prevent Mold From Coming Back
To prevent mold from returning, you need to eliminate the moisture that allows it to grow. You’ll protect your space by keeping surfaces dry, sealing leaks quickly, and checking hidden areas after every repair.
Use mold-resistant materials when you replace drywall, insulation, or paint, so your ceiling stays safer longer. Strong humidity control matters too; keep indoor humidity between 30% and 60% with fans, venting, and a dehumidifier when needed.
You’re not fixing this alone—every careful step helps your home stay healthy and comfortable.
- Inspect the repaired area weekly.
- Dry any damp spot within 24 hours.
- Maintain airflow in attics and bathrooms.
- Monitor humidity with a reliable gauge.
When to Call a Mold Remediation Pro
Call a mold remediation pro when the affected area is larger than about 10 square feet, when mold keeps returning after cleanup, or when you suspect it has spread into insulation, HVAC ducts, or wall cavities.
You should also call one if you notice musty odor, staining, or visible growth near electrical fixtures. If anyone in your home has mold symptoms like coughing, wheezing, eye irritation, or headaches, don’t wait; hidden colonies can raise health risks.
A certified team can inspect moisture sources, contain the area, remove contaminated materials, and verify drying with proper testing.
You’re not overreacting by asking for help; you’re protecting your home and the people in it. Early intervention limits damage, reduces costs, and gives you a safer, cleaner recovery.
Frequently Asked Questions
What Tools Help Detect Hidden Ceiling Moisture?
You can use moisture meters and thermal imaging to detect hidden ceiling moisture. You’ll pinpoint damp spots fast, verify leak paths, and feel confident because these tools give you precise, reassuring readings before damage spreads.
How Long Does Ceiling Water Damage Drying Usually Take?
Usually, you’ll need 24–72 hours, though drying factors and moisture levels can stretch that. Like sunlight pulling mist from a valley, you’ll want fans, dehumidifiers, and steady airflow to help your ceiling dry safely.
Can Ceiling Paint Trap Mold Spores After Repairs?
Yes, ceiling paint can trap mold spores if you’ve left moisture behind. You should use breathable paint types after full drying, because they’ll reduce mold growth risks and help you feel confident, protected, and included.
Should I Test Air Quality After Ceiling Mold Cleanup?
Yes—you should test air quality after cleanup, especially if you still notice odors or symptoms. You’ll verify mold spore levels, confirm your air quality is safe, and feel confident your space is healthy again.
What Personal Protective Gear Is Best for Small Mold Repairs?
You’ll want an N95 respirator, gloves, goggles, and disposable coveralls; they’re the best protective gear options for small mold repairs. Use mold prevention strategies, ventilate well, and you’ll reduce exposure while you work safely.
Wrap-Up
By stopping the leak, drying the ceiling fast, and removing damaged materials, you give mold the same bad timing it needs to lose its grip. When you inspect carefully, repair safely, and control moisture, small problems stay small. If stains return, odors persist, or the damage spreads, call a mold remediation pro. You’ll protect your home, your health, and your ceiling—and, almost by coincidence, make future repairs far less likely.
Recent Posts
Why Mold Remediation Matters After Flooding
When floodwater lingers, mold doesn’t wait. It can spread through wet drywall, saturated insulation, and
What Is Mold Remediation After Flood?
After a flood, mold can begin growing in as little as 24 to 48 hours
Fast Mold Cleanup After Flood Damage
When floodwater rises, mold doesn’t wait for an invitation. Fast Mold Cleanup means removing standing