
Contents
When you need to Extract Flood Water Fast, you need to act quickly, but not blindly. Shut off power first, stop the source if you can, and then choose the right removal method based on water depth, debris, and access. A pump, wet vac, or even buckets can all work, but only if you clear the path and start drying right away. The first few steps decide how much damage you’ll face next.
Key Takeaways
- Shut off electricity and stop the water source before entering flooded areas to prevent shock or further flooding.
- Use submersible or trash pumps for deep water, and choose a pump sized above the flood volume for faster extraction.
- For shallow water, use a wet/dry vacuum, buckets, mops, and towels, working from the lowest point outward.
- Remove soaked rugs, cardboard, insulation, and debris quickly to reduce contamination and speed drying.
- Dry carpets and hidden moisture fast with air movers, dehumidifiers, and moisture checks to prevent mold growth.
Shut Off Power and Stop the Source
Before you start pumping or mopping, shut off the electricity to the flooded area at the main breaker if it’s safe to do so, and don’t enter standing water near outlets, cords, or appliances.
You protect yourself and your household by treating flood safety as the first priority. If you smell gas, hear sparking, or see damaged wiring, leave the area and call emergency services or your utility company.
Next, stop the water source: close the main water valve, turn off a leaking appliance, or contact your landlord or plumber if the break is hidden.
Clear nearby people from the area and keep children and pets out.
When you control electrical hazards and stop the inflow, you create safer conditions for the next cleanup step.
Remove Standing Water With Pumps
Choose the right pump for the water depth and debris level so you can move floodwater quickly without clogging the system.
Set up a safe drainage path away from the structure, and make sure discharge won’t flow back into the area.
Monitor the water level and pump output continuously so you can adjust placement and keep removal efficient.
Choose The Right Pump
A submersible pump can clear several inches of standing water far faster than buckets or mops, especially in basements and low-lying rooms.
You should match pump types to the job: utility pumps handle shallow water, while trash pumps move water with debris.
Check pump capacity in gallons per hour and pick a model that exceeds the flood volume you’re facing. A higher capacity shortens extraction time, but only if the pump can handle the water depth.
Choose a pump with a float switch if you want hands-off operation. Keep a backup unit nearby so your crew stays ready if the first pump stalls.
Verify the inlet screen won’t clog easily, and use a hose size that lets the pump work efficiently.
Set Up Safe Drainage
Place the pump on stable, elevated ground and route the discharge hose downhill to a safe drainage point so floodwater flows away from the building, electrical equipment, and neighboring properties.
Secure all hose connections, and keep the line straight to reduce kinks, backflow, and loss of output. Use a rigid extension if you need to cross a doorway or wall opening, and seal gaps so water won’t return inside.
Choose drainage techniques that match the site, such as directing flow to a storm drain, gravel area, or approved sump discharge. Confirm your water diversion path won’t erode soil, block walkways, or flood a shared area.
When you set this up well, you protect your crew, keep the job organized, and move toward a safer, drier space.
Monitor Water Removal
Watch the water level and pump performance closely so you can clear standing water as fast as possible. Check intake screens, hose connections, and discharge flow every few minutes.
If the pump loses prime, shut it down, clear debris, and restart it before damage starts. Keep one pump working while you prep a backup, so your team stays ahead of rising water.
Mark the water level on a wall or post and compare it against each round of pumping. Use moisture monitoring tools to find trapped dampness after visible water drops.
Move hoses as needed to reach low spots and avoid recirculation. Stay consistent, stay alert, and you’ll help your crew finish faster, protect materials, and restore normal conditions with less risk.
Extract Flood Water With Wet Vacuums
Choose a wet vacuum rated for water extraction, with a tank size and hose length that match the flooded area.
You’ll get better results if you empty the tank often and keep the nozzle in full contact with the surface.
Move methodically across the space so you remove remaining water fast and avoid spreading it.
Choosing A Wet Vacuum
A wet vacuum can speed up floodwater removal when the standing water is shallow and you need controlled extraction. Choose a model with wet vacuum features like a sealed motor, corrosion-resistant tank, and a hose that reaches tight spaces.
You’ll want a float shutoff so the unit stops before overflow, plus a filter designed for liquid pickup. Check capacity against your cleanup area so you don’t waste time emptying it too often.
Keep vacuum maintenance simple by rinsing the tank, drying attachments, and inspecting cords after each use. If you’re working with a trusted crew, pick gear that’s easy to share, store, and restart quickly.
The right wet vacuum helps you stay organized, efficient, and ready for the next pass.
Effective Water Removal
Start extracting flood water with the wet vacuum at the deepest edge and work toward the exit so you don’t trap water behind you.
Keep the nozzle flat to the floor and move in slow, overlapping passes for consistent pickup.
Empty the tank before it reaches the max line so suction stays strong and you can keep going with the team.
Check water quality as you work; muddy or oily water can clog filters and signal a need for deeper cleaning.
Watch cords, outlets, and sharp debris, and follow safety precautions every step.
If the area is large, divide it into sections and keep a steady route.
That way, you’ll remove water faster, reduce slip risk, and restore the space with confidence.
Remove Shallow Water by Hand
When the water is only ankle-deep or pooled in small areas, you can remove it by hand with buckets, a wet/dry vacuum, mops, or towels.
Choose the right hand tools for the space, and keep your path clear so you can work quickly without splashing contaminated water. Wear gloves and boots, and check water safety before you step in; shut off power to the area if needed.
Scoop or vacuum from the lowest point first, then move outward in small sections. Wring towels into a bucket and empty it often to maintain pace.
Use firm, repeated passes with the mop to lift the last film of water. Work together if possible, so you can rotate tasks, stay alert, and finish faster.
Pull Out Soaked Materials and Debris
Once the standing water is down, pull out anything that’s soaked and no longer usable, including rugs, cardboard, paper goods, insulation, and loose debris.
Work methodically so you don’t miss hidden pockets under furniture or along walls. Wear gloves, boots, and a mask, then sort items into keep, clean, and discard piles.
Move soaked materials outside as soon as you can to reduce odor, mold, and contamination spread. Keep pathways clear so your crew can move safely and stay efficient together.
Bag small debris first, then place larger waste in lined bins or heavy-duty bags for debris disposal. If sewage or chemicals touched the load, isolate it and follow local disposal rules.
Stay focused, stay organized, and help your space recover fast.
Dry Carpets and Padding Quickly
Use a wet vac or carpet extractor to pull water from the carpet fibers as soon as possible.
Then lift the carpet edge and remove or dry the padding with air movers and dehumidifiers, since trapped moisture can keep the area wet for days.
Check both layers repeatedly so you can stop hidden dampness before mold starts.
Carpet Water Extraction
Start carpet water extraction immediately with a high-powered wet vac or water extractor, working in slow, overlapping passes to pull moisture from the carpet fibers and the pad below.
You’ll get better results if you remove as much free water as possible before it settles deeper. Keep the wand flat, maintain steady suction, and empty the tank often so performance stays strong.
Focus on high-traffic areas, seams, and edges where water lingers. If the carpet feels saturated, make additional passes until less water rises from the pile.
Good carpet cleaning here protects your space, reduces odors, and helps your crew stay on track.
Check carpet padding at the surface for rebound, but don’t lift it yet. Your quick, disciplined effort matters, and you’re not handling this alone.
Padding Drying Methods
To dry carpet padding quickly, lift the carpet edge in a few affected spots and check whether the pad is holding water or only damp. If it’s soaked, you’ll need strong drying techniques fast.
Remove standing moisture with a wet vacuum, then place air movers so they push air under the carpet. Use dehumidifiers to pull humidity from the room and help your crew stay ahead of mold.
Choose padding materials that dry cleanly; bonded foam usually reacts better than felt.
- Feel relief as water leaves fast.
- Protect the room before odors start.
- Save materials when drying starts early.
- Stay with your team through the cleanup.
Speed Drying With Fans and Dehumidifiers
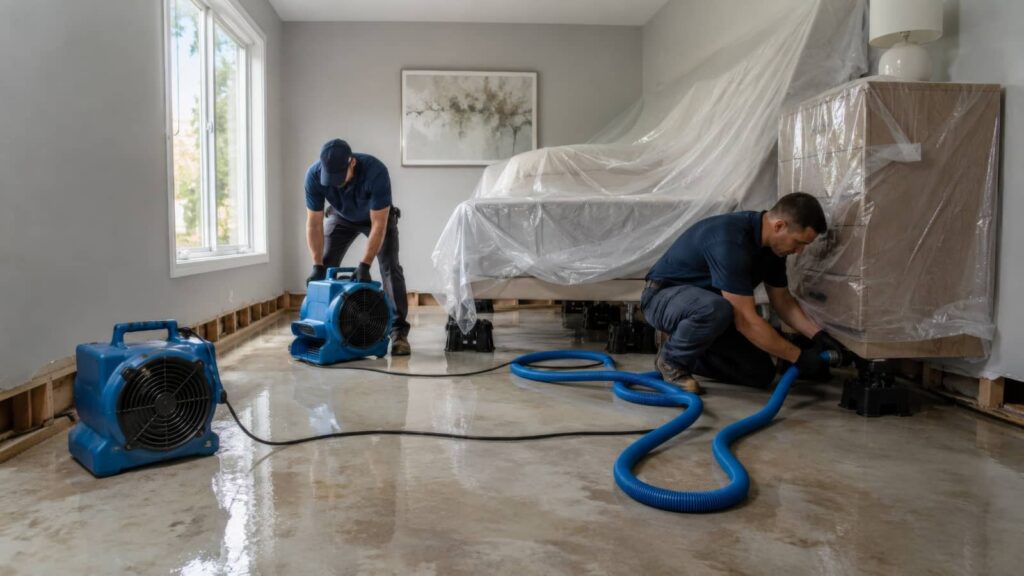
Once standing water is gone, you can speed up drying by placing high-velocity fans to move air across wet floors, walls, and baseboards, and by running dehumidifiers to pull moisture from the air.
Set fan placement so airflow circulation covers the entire room, and choose fan types that fit the space. Use dehumidifier settings that match the room size and target humidity levels near 40% to 60%.
Adjust temperature adjustment if the space feels cool, because warmer air can improve moisture control. Check drying time each day, and reposition equipment when needed for better coverage.
You’ll protect energy efficiency by running only the gear you need. Keep up equipment maintenance: clean filters, empty tanks, and inspect cords.
With steady airflow, you and your team can dry faster and safer.
Check for Hidden Moisture in Walls
After surface drying is underway, check walls for moisture that isn’t visible from the outside. Use a moisture meter during wall inspection to compare damp and dry zones, especially near baseboards, corners, and seams.
Tap the surface and listen for soft spots that can signal trapped water. If readings stay high, you’re not alone—hidden moisture is common after flooding and needs attention fast.
- Mark every wet reading so you can track progress.
- Recheck at the same time each day.
- Watch for swelling, staining, or cold patches.
- Open small access points only when necessary.
Careful moisture detection helps you stay organized, protect your space, and move forward with your crew confidently.
Clean and Disinfect Flooded Areas
Before you disinfect, remove all mud, debris, and standing water so cleaners can reach every surface. Wear gloves, boots, and eye protection, then wash floors, walls, counters, and fixtures with hot water and detergent. Rinse well, because residue can reduce disinfectant performance.
Next, apply a disinfectant labeled for flood damage cleanup and follow the contact time on the label. Focus on porous items that stayed wet from water contamination; if they can’t be fully cleaned, discard them.
Clean one room at a time so you stay organized and protect your household. Use separate buckets and rags for dirty and clean zones. Ventilate the area while you work, and keep children and pets away until surfaces are dry and safe.
Prevent Mold After Flood Water Removal
As soon as you remove flood water, dry the area fast to stop mold from growing. You’re protecting your home and your people by acting now.
Use fans, dehumidifiers, and open windows if outdoor air is dry. Remove soaked carpets, drywall, and insulation within 24 to 48 hours. Track humidity and keep it below 60% with moisture control techniques. Inspect hidden spaces behind baseboards and inside cabinets.
- You’ll reduce the musty smell that makes rooms feel unsafe.
- You’ll cut the risk of respiratory issues for everyone nearby.
- You’ll save materials before they turn into waste.
- You’ll strengthen your mold prevention strategies and help your space feel like home again.
Clean surfaces, then keep monitoring for a week.
Frequently Asked Questions
How Long Does Floodwater Extraction Usually Take?
Usually, you’ll see floodwater extraction take 4–24 hours, depending on volume, access, and extraction efficiency. Your floodwater duration may extend if hidden moisture remains, so you should inspect, pump, and dry quickly.
What Tools Work Best for Small Basement Floods?
For small basement floods, you’ll use sump pumps, wet vacuums, water absorbent, floor fans, dehumidifiers, and drainage hoses; 60% of water damage starts small, so you’re acting fast with tools that fit your space.
Can Floodwater Damage Be Reversed Completely?
No, you usually can’t reverse floodwater damage completely. You can reduce floodwater effects with fast drying, cleaning, and structural repairs. Your restoration options include dehumidification, antimicrobial treatment, material replacement, and professional inspection.
Should I Call Insurance Before Starting Cleanup?
Yes—call your insurer before cleanup; like a lifeline in rough waters, you’ll protect your insurance claims and set cleanup priorities. Document damage, ask about emergency steps, then start only after you’ve got guidance.
When Is Professional Flood Extraction Necessary?
You’ll need professional flood extraction when water covers large areas, threatens structural materials, or contains contamination. A flood assessment helps you choose safe extraction techniques, prevent hidden moisture, and protect your home quickly.
Conclusion
By acting fast, you reduce damage and limit health risks. Shut off power, stop the water source, and remove standing water with the right pump or wet vacuum. For shallow flooding, use buckets and towels, then clear soaked materials so airflow can work. Keep dehumidifiers running, check walls for hidden moisture, and disinfect every affected surface. Why let water linger when you can dry, clean, and protect your space now?
Recent Posts
How to Restore Water Damage After Flood
After a flood, you’re facing more than a little cleanup, and your first move is
7 Smoke Odor Removal Tips After Water Damage
Smoke odor after water damage can linger in places you’d never think to inspect first.
What Removes Odor After Water Damage?
After water damage, you need to remove the source of the smell, not just mask