
Contents
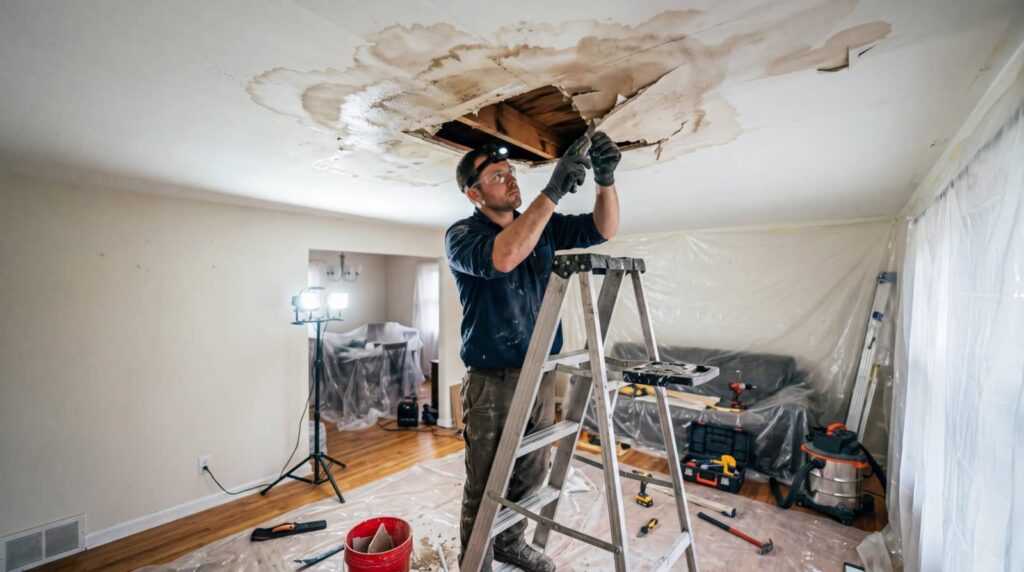
When you need to Repair Ceiling Leak damage after noticing a brown ceiling stain from a roof leak, you need to stop the source, dry the area fast, and inspect for hidden damage. You’ll then cut out weakened drywall, remove wet insulation, and treat any remaining stains or cracks before the surface can fail again. The repair sequence matters, and the next step can decide whether you fix the damage once or keep chasing it.
Key Takeaways
- Stop the leak first by shutting off water and inspecting the ceiling, plumbing, roof, and HVAC lines for the source.
- Dry the ceiling quickly with ventilation, fans, air movers, and dehumidifiers to prevent further damage.
- Remove damaged drywall and wet insulation carefully, and turn off nearby power before opening the ceiling.
- Repair stains, cracks, and sagging with primer, joint compound, screws, and ceiling paint.
- Prevent mold by cleaning exposed framing, keeping humidity below 60%, and removing wet materials within 24–48 hours.
Stop the Leak and Find the Source
First, you need to stop the active leak and trace the water to its entry point. Shut off the affected fixture or water supply, then inspect the ceiling area above the stain.
Use leak detection tools, a flashlight, and controlled observation to follow moisture paths, drips, and discoloration. Check plumbing joints, roof penetrations, HVAC lines, and nearby drains until you confirm the exact failure.
For accurate source identification, mark the wettest point, then compare it with the visible damage below. If the source sits in an attic or crawlspace, move carefully and avoid disturbing insulation more than necessary.
Once you’ve isolated the cause, you can act with confidence and protect your home like a team that solves the problem together, quickly and methodically.
Dry the Ceiling Quickly
Once you’ve stopped the source, dry the ceiling immediately to limit staining, sagging, and hidden mold growth. Open windows and doors if weather allows, and run exhaust fans to establish strong ventilation methods.
Then position drying equipment, such as air movers and a dehumidifier, to pull moisture from the room and speed evaporation. Keep airflow directed across the damp surface, not at one spot, so you don’t trap humid air.
Check the ceiling every few hours for softening, discoloration, or new drips. Replace wet towels or absorbent pads as needed, and empty the dehumidifier reservoir regularly.
You’re not alone in this repair; steady, methodical drying protects your home and helps you stay ahead of damage. Avoid using heat so high that it cracks paint or worsens the ceiling finish.
Remove Damaged Drywall and Insulation
If the ceiling still feels soft, sags, or shows staining after drying, you’ll need to remove the damaged materials before patching.
Turn off power to nearby fixtures, then score the painted surface along joists with a utility knife. Cut back to solid drywall, and pry out only the compromised sections so you can keep the opening controlled.
Pull out wet insulation, bag it immediately, and inspect the cavity for hidden moisture or debris. Wear gloves, a mask, and eye protection to keep your crew safe.
Follow local drywall disposal rules, then schedule insulation replacement with material rated for the space.
Once the cavity is clean and dry, you’ll be ready to move forward with the repair as a team.
Repair Ceiling Stains, Cracks, and Sagging
After the cavity is dry and clear, you can repair the visible damage by addressing stains, cracks, and any remaining sagging.
You belong to a solid repair process when you seal stains with a stain-blocking primer before applying matching ceiling paint. For hairline cracks, open them slightly, fill with joint compound, and sand smooth once cured.
If the surface still sags, add drywall screws into joists or install a support cleat from above if accessible. These repair techniques restore alignment and prepare the area for finish coats.
- Prime stained areas
- Fill and tape cracks
- Sand repaired seams
- Tighten loose drywall
- Recoat with ceiling paint
Prevent Mold After Ceiling Leak Water Damage
To prevent mold after a ceiling leak water damage, dry the area completely and keep humidity below 60% with ventilation or a dehumidifier.
Remove wet insulation, drywall, and debris within 24 to 48 hours, then clean exposed framing with a detergent solution.
You should inspect hidden cavities, because trapped moisture can keep spores active.
Use fans to move air across the ceiling, but don’t aim them at unstable materials.
Monitor humidity daily with a hygrometer for reliable humidity control.
If staining, musty odor, or visible growth appears, apply EPA-approved mold treatment and replace contaminated porous materials.
For effective mold prevention, seal the repair only after moisture readings return to normal.
When you follow these steps, you protect your home and keep your space healthy for everyone there.
Frequently Asked Questions
How Do I Know if Ceiling Water Damage Is Structural?
You’ll know it’s structural if sagging, cracks, rot, or repeated moisture threaten structural integrity. Use leak detection to trace the source, inspect framing, and call a professional if movement, softening, or deflection persists.
Can Ceiling Leak Damage Affect Electrical Wiring?
Absolutely—ceiling leaks can damage wiring, creating water damage and electrical hazards. You should shut off power, inspect for discoloration or corrosion, and call a licensed electrician so you don’t end up between a rock and hard place.
How Long Does Ceiling Repair Usually Take?
You’ll usually finish ceiling repair in one to three days, depending on damage. Drying methods may add time; repair techniques, like patching and repainting, typically take hours once moisture readings confirm the area’s fully dry.
When Should I Call a Professional Instead of DIY?
Call a professional when you see active leaks, sagging drywall, mold, or electrical risk; your DIY Limitations may worsen damage. Professional Benefits include moisture testing, structural repairs, and code-compliant restoration you can trust.
Will Insurance Cover Ceiling Leak Water Damage Repairs?
Usually, you can get coverage if the leak’s sudden and accidental, but you’ll need to file insurance claims and check coverage limits. You should document damage, review exclusions, and call your adjuster promptly.
Conclusion
Now that you’ve stopped the leak, dried the area, removed damaged materials, and repaired stains, cracks, and sagging, you’re ready to protect the ceiling from future damage. Seal every repaired spot, repaint with ceiling-grade paint, and watch for any new discoloration or soft areas. Don’t let a small leak become a bigger problem—handle moisture fast, and you’ll keep your ceiling sound, clean, and safe. In ceiling repair, isn’t prevention the strongest finish?
Recent Posts
How to Restore Water Damage After Flood
After a flood, you’re facing more than a little cleanup, and your first move is
7 Smoke Odor Removal Tips After Water Damage
Smoke odor after water damage can linger in places you’d never think to inspect first.
What Removes Odor After Water Damage?
After water damage, you need to remove the source of the smell, not just mask