
Contents
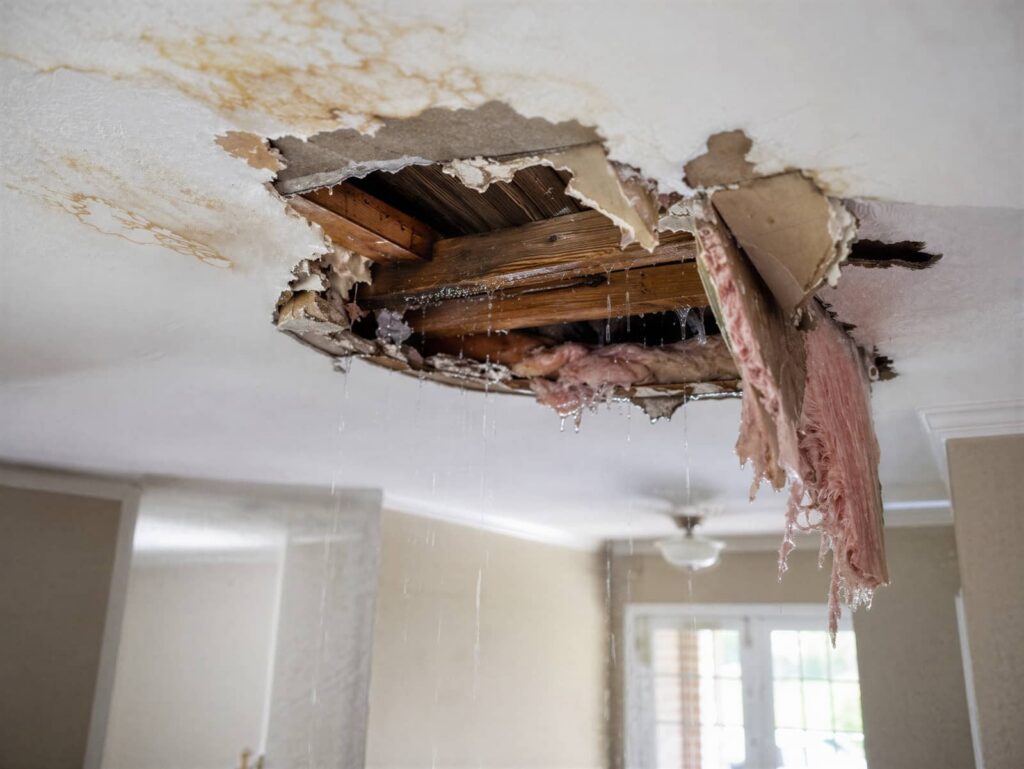
When a small water stain spread across a ceiling in one afternoon, it proved how fast hidden damage can escalate. Water Damage Repair starts with locating the leak, stopping the water, and drying the area before mold sets in. Then you can assess sagging, remove damaged material, and restore the finish with precision. The next steps decide whether you handle the repair yourself or call a pro.
Key Takeaways
- Identify the leak source first by inspecting stains, sagging drywall, and nearby attic or ceiling cavities.
- Stop the water, contain drips, protect belongings, and dry the area with fans and a dehumidifier.
- Remove damaged drywall or plaster, then patch with matching material once everything is completely dry.
- Match ceiling texture, finish, and paint carefully, and inspect for mold before closing the repair.
- Call a professional for extensive damage, and prevent future leaks with regular roof, gutter, and flashing inspections.
Identify the Ceiling Leak Source First
Before you repair a ceiling leak, you need to pinpoint the source, not just the stain. Use leak detection methods to trace moisture paths above the damaged area, including plumbing runs, HVAC lines, roof penetrations, and nearby fixtures.
You’ll make faster progress when you document drip points, discoloration patterns, and any active wetness. During source analysis, inspect the attic or ceiling cavity with a flashlight and moisture meter, then compare findings with recent weather or fixture use.
Don’t assume the leak is directly overhead; water often travels along framing before it appears below. By working methodically, you’ll identify the true failure point and join other informed homeowners who solve the problem with precision, not guesswork, before moving to repairs.
Stop the Water and Protect the Room
Shut off the water supply or stop the specific source as soon as you can, then contain the leak to limit further damage.
If you can’t reach the valve safely, call building maintenance or a licensed plumber right away.
You should place buckets, towels, or plastic sheeting under the drip and move furniture, electronics, and valuables away from the affected area.
Use protective measures such as turning off nearby circuits if water is close to fixtures or outlets.
Mark the ceiling area below the water source so you can monitor changes.
Keep traffic out of the room to reduce stress on weakened surfaces.
These steps help you stabilize the space, protect belongings, and stay aligned with a coordinated repair plan that’s effective, safe, and built for your household.
Dry the Ceiling Before Mold Starts
Once the leak is contained, you need to dry the ceiling fast to reduce the risk of mold and hidden damage.
Start by increasing airflow with fans aimed across, not directly into, the affected area. Run a dehumidifier nearby to pull moisture from the air and support mold prevention.
If you have access, lift the room’s temperature slightly, because warmer air speeds evaporation. Use drying techniques that keep the surface moving air consistently, and keep windows closed if outdoor humidity is high.
Replace saturated insulation only after the area is fully dry. Check the space several times a day so you can respond quickly if moisture lingers.
When you act promptly, you protect your home and stay in control together.
Check for Sagging, Stains, and Soft Spots
Inspect the ceiling panels for any sagging, since deformation often indicates trapped moisture or structural weakening.
Look for water stain patterns that spread outward or darken over time, as they can map the leak path.
Press lightly on suspect areas to detect soft spots, because these often mean the material’s integrity has already been compromised.
Sagging Ceiling Panels
A sagging ceiling panel often signals ongoing water intrusion, so you should check the area for visible bowing, water stains, and soft spots before any repair work begins.
You can then isolate sagging causes, such as saturated drywall, loosened fasteners, or compromised framing, without guessing. Press gently with a gloved hand; if the surface flexes, crumbles, or feels spongy, mark it for removal.
Don’t load the panel further, and keep the work zone clear so you and your crew stay safe.
Choose repair methods that match the damage: dry the cavity, replace failed sections, and secure new panels to sound framing.
When you act methodically, you protect the structure and reinforce a reliable repair plan for your team.
Water Stain Patterns
Water stains often spread outward from the leak source, so you should map their edges, note discoloration gradients, and compare them with any nearby sagging or soft spots. You’ll identify likely water stain causes faster when you inspect rings, brown halos, and irregular borders under strong light.
- Mark the outer limit of each stain.
- Record color changes from center to edge.
- Check whether stains align with seams, fixtures, or prior repairs.
- Note any active moisture before stain removal starts.
You’re not just documenting damage; you’re building a clear case for targeted repair with your team.
Precise pattern tracking helps you distinguish old marks from fresh intrusion, prioritize cleanup, and choose the right materials before the ceiling worsens.
Soft Spot Detection
To identify a ceiling soft spot, you’ll probe for sagging sections, damp discoloration, and areas that yield slightly under light pressure.
Use focused inspection techniques: sight along the surface for bowing, press gently with a clean fingertip, and listen for a dull give.
Soft spot causes often include prolonged moisture intrusion, failed flashing, or saturated drywall that’s lost structural stiffness.
Mark every suspect area, then compare it with nearby dry material so you can judge severity.
If the texture feels spongy or the stain edge is expanding, your ceiling likely needs immediate attention.
You’re not just checking damage; you’re confirming whether the assembly still has integrity.
Acting early helps you protect your space, your repairs, and everyone who relies on it.
Cut Out Damaged Drywall or Plaster
Mark the full boundary of the damaged drywall or plaster with a pencil, extending to solid material beyond any visible staining or soft areas.
Use a utility knife or drywall saw to cut along the marked lines with controlled, clean passes.
Remove all loose, crumbling, or delaminated material so you’re left with a stable opening for repair.
Mark Damage Boundaries
Even after the leak stops, you should cut back only to sound material by tracing the damaged area’s perimeter and marking clean, straight boundaries on the ceiling.
Use damage assessment to identify where staining, sagging, or soft spots end, then complete boundary marking with a level and pencil so your repair line stays square.
You’re not just preparing a patch—you’re setting up a clean, professional result that fits your space.
- Map the full outline of discoloration.
- Extend lines to solid framing or joists.
- Verify the marked shape is rectangular.
- Double-check measurements before you cut.
This approach helps you work confidently, keeps the repair contained, and gives you a precise opening for the next step in the process.
Remove Loose Material
With the boundaries marked, cut out all loose, cracked, or water-damaged drywall or plaster until you reach firm, intact material. Use a utility knife for drywall and a masonry chisel for loose plaster, and keep your cuts clean and square.
Remove any softened insulation, wet debris, or compromised fasteners so the repair area can dry fully. If you find peeling paint, scrape it back to a solid edge before patching.
Wear eye protection and a dust mask, and support adjacent sections so you don’t enlarge the damage. You’re creating a stable base that your team can rebuild with confidence.
After removal, vacuum the cavity and inspect framing for hidden moisture or mold before moving to the next repair step.
Patch Ceiling Damage and Seal the Leak
Once the source of the leak is dry and secure, remove any loose plaster, sagging drywall, or damaged insulation around the ceiling opening so the repair bonds to sound material.
Cut a clean, square edge, then fit a drywall patch that matches the thickness of the existing ceiling. Use backing strips or a repair clip system to support the patch during ceiling patching.
Apply joint compound in thin layers, pressing it firmly into the seams. For leak sealing, inspect the source above and caulk, tighten, or replace failed components before closing the opening.
- Measure accurately.
- Secure the patch.
- Seal all gaps.
- Confirm the area stays dry.
You’re restoring the ceiling with a method your crew can trust.
Match the Texture and Finish
After the patch cures, blend it into the surrounding ceiling by matching both texture and finish.
Start with texture matching: test a small area, then use the same spray, roller, or trowel pattern already on the ceiling. Feather the edges so the repair disappears under normal light.
For finish selection, compare sheen carefully; flat, eggshell, and satin reflect light differently, and the wrong choice will expose the patch.
Prime the repaired area first, because primer evens porosity and helps paint lay uniformly.
Then apply thin coats, keeping your strokes consistent with the original surface. If you work methodically, you’ll create a seamless result that feels like part of the room, not an obvious fix.
Spot and Remove Mold After a Leak
Before you repair a leak-stained ceiling, inspect the area for mold growth and remove any contamination you find. Use targeted mold removal to protect the repair and your indoor air quality.
Keep the space dry and improve air circulation so spores don’t settle again. Wear gloves, eye protection, and a respirator if you’re disturbing visible growth.
- Mark stained or musty areas.
- Clean nonporous surfaces with a detergent solution.
- Remove and discard porous material that stays contaminated.
- Dry the cavity completely before patching.
You’ll support a cleaner, safer finish when you treat every affected section methodically.
If the odor lingers or the damaged area keeps expanding, pause the repair and reassess moisture control before you close the ceiling.
Call a Water Damage Pro When Needed
If the leak has soaked insulation, spread into multiple ceiling cavities, or caused ongoing staining despite repairs, call a water damage professional to assess the source and scope.
You’ll get an emergency response that can stabilize the area, measure hidden moisture, and identify structural risks before they worsen.
A professional assessment also helps you verify whether drywall, framing, or electrical components need targeted removal or drying.
You don’t have to guess at the damage or handle hazardous conditions alone.
By bringing in a qualified pro, you join a process built on clear diagnostics, safe containment, and documented findings.
That support helps you make informed decisions and move forward with confidence, knowing the repair plan reflects the real extent of the problem.
Prevent Future Ceiling Leaks
To prevent future ceiling leaks, inspect the roof, flashing, gutters, and attic ventilation on a regular schedule so you can catch small failures early. Your preventive maintenance plan should include regular inspections after storms and before seasonal changes.
- Check shingles, sealant, and flashing for cracks or lifts.
- Clear gutters and downspouts so water drains away fast.
- Confirm attic vents stay unobstructed and insulation stays dry.
- Repair minor defects immediately to avoid hidden moisture buildup.
When you stay consistent, you protect your home and keep your household confident in the structure above you.
Document each visit, note changes, and track recurring trouble spots. That record helps you act faster, reduce repair costs, and stay part of a community that values well-kept homes.
Frequently Asked Questions
What Should I Do if Water Is Dripping From a Light Fixture?
Turn off the breaker, avoid the wet light fixture, and move out fast. You should call emergency response, then inspect light fixture safety only after power’s off. Keep others clear and document the leak.
How Much Does Ceiling Leak Repair Usually Cost?
You’ll usually pay $150–$1,500, depending on leak detection, repair materials, and ceiling damage. Like a trusty alchemist’s ledger, costs rise with hidden plumbing issues, mold, or structural repairs, but you’re not alone here.
Can I Stay in My Home During Ceiling Leak Repairs?
Yes, you can often stay, if you follow safety precautions and your contractor contains the leak area. If ceilings sag, wiring’s exposed, or mold’s present, you’ll need temporary accommodations until repairs are complete.
Does Homeowner’s Insurance Cover Ceiling Water Damage?
Usually, yes, if the water damage is sudden and accidental. You’ll need to file insurance claims promptly, document damage, and review exclusions. Your policy may not cover gradual leaks or poor maintenance.
How Long Does It Take for a Wet Ceiling to Dry?
A wet ceiling usually dries in 24 to 72 hours, depending on saturation, airflow, and temperature. You’ll want drying techniques and moisture assessment to verify progress, because you’re not guessing—you’re restoring with precision and confidence.
Review
To repair ceiling leak water damage, you need to act quickly: find the source, stop the water, dry the area, and remove any compromised drywall or plaster. Inspect for sagging, stains, soft spots, and mold, then restore the texture and finish. For example, if a bathroom leak stains a bedroom ceiling, you’d shut off the supply, dry the cavity, replace the damaged board, and repaint. If the damage is extensive, call a water damage professional.
Recent Posts
How to Restore Water Damage After Flood
After a flood, you’re facing more than a little cleanup, and your first move is
7 Smoke Odor Removal Tips After Water Damage
Smoke odor after water damage can linger in places you’d never think to inspect first.
What Removes Odor After Water Damage?
After water damage, you need to remove the source of the smell, not just mask