
Contents
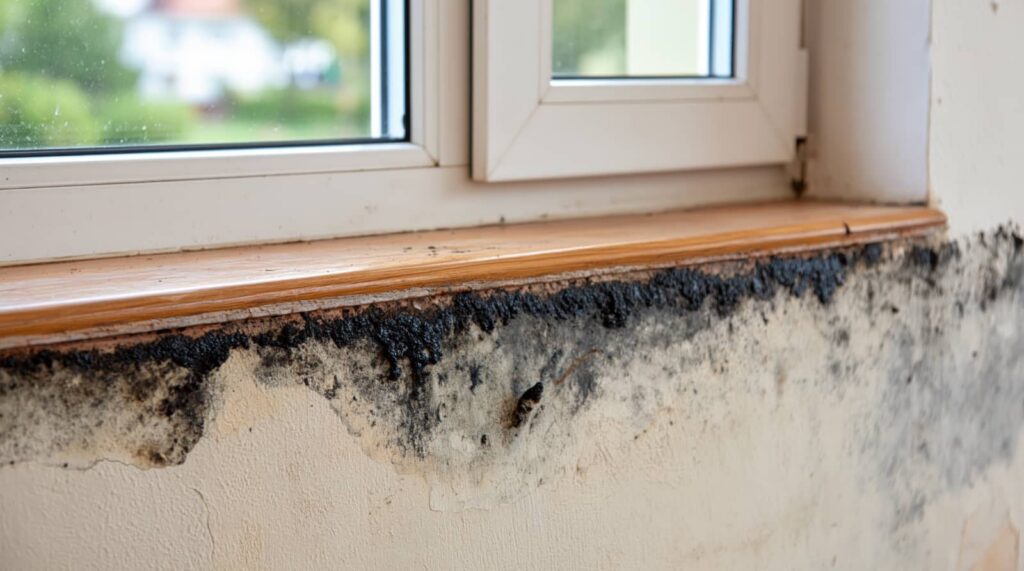
When floodwater rises, mold doesn’t wait for an invitation. Fast Mold Cleanup means removing standing water, pulling out soaked materials, and starting to dry walls, floors, and ceilings within 24 to 48 hours. Inspect hidden spaces, clean affected surfaces, and check HVACs and attics for moisture. If mold spreads beyond a small area or hides inside cavities, professional remediation can prevent a bigger failure than you expect.
Key Takeaways
- Act within 24 to 48 hours by removing standing water, wet items, and any saturated materials that cannot dry quickly.
- Wear gloves, boots, and an N95 respirator while increasing airflow with fans and dehumidifiers if it is safe to do so.
- Inspect hidden moisture in walls, floors, insulation, and ducts; treat musty areas as contaminated until they are dry.
- Clean nonporous surfaces with detergent and water after drying, then rinse and dry them completely to remove mold.
- Call mold remediation professionals if the affected area is larger than 10 square feet or moisture is behind walls.
Act Fast to Stop Mold Growth
Act quickly after flood damage because mold can begin growing within 24 to 48 hours on damp surfaces.
You need rapid response strategies to protect your space and your crew. Shut off standing water, remove soaked items, and increase airflow with fans and dehumidifiers if power’s safe.
Wear gloves, boots, and an N95 respirator to reduce exposure. Bag wet debris, seal it, and get it out fast.
Clean hard surfaces with detergent and water, then dry them completely.
Follow mold prevention tips by keeping humidity low, checking materials for residual dampness, and documenting what you’ve done.
When you move fast together, you limit spread, reduce cleanup costs, and help your home feel safe again for everyone.
Inspect Hidden Moisture
Inspect wall cavities for damp insulation, staining, or warped framing, since moisture often stays trapped behind finished surfaces.
Scan under flooring and along baseboards for soft spots, discoloration, or a musty odor that signals hidden water.
Use a moisture meter to verify readings in suspect areas and track any elevated levels before you begin cleanup.
Check Wall Cavities
After floodwater enters a wall, you need to check the cavity for trapped moisture, damp insulation, and hidden mold growth. Cut a small inspection opening near the wet area, then use a flashlight and moisture meter to assess the framing, sheathing, and insulation.
If the reading stays high, keep the cavity open and increase airflow with fans and dehumidifiers. Remove any wet insulation during your wall inspection, since it won’t dry fast enough and can feed mold.
Mark affected areas, photograph conditions, and track drying progress so your team stays coordinated. Good mold prevention depends on quick, accurate checks inside the wall, not just on the surface.
If you smell mustiness or see staining, treat the cavity as contaminated until it tests dry.
Scan Under Flooring
Once you’ve checked the wall cavities, move to the flooring because floodwater often hides beneath carpet, vinyl, wood, and baseboards. You should inspect each seam, lift loose edges, and note soft spots or discoloration.
Different flooring materials trap moisture in different ways, so adapt your scanning techniques to each surface and joint. Work methodically so your team stays aligned and no hidden wet area gets missed.
- Pull back carpet corners and padding
- Check vinyl seams and lifted edges
- Remove baseboards where staining appears
- Scan subfloor joints and connections for dampness
If you find trapped water, document the area, then open it for drying before mold can spread. Your careful sweep helps everyone on site protect the space and move cleanup forward with confidence.
Use Moisture Meters
A moisture meter gives you a fast, reliable way to find trapped water behind surfaces you can’t see. Use it after flooding to check baseboards, drywall, subflooring, and framing before you close walls or start repairs.
Compare readings in wet and dry areas so you can map the spread of hidden moisture. Different moisture meter types, including pin and pinless models, serve different moisture detection techniques.
Pin meters probe deeper and help you verify suspect spots, while pinless meters scan larger areas quickly. Work methodically, record readings, and repeat checks until levels drop to normal.
When you measure carefully, you protect your crew, speed cleanup, and keep your restoration team aligned.
Remove Standing Water and Wet Items
Pump out any standing water as soon as possible to reduce moisture levels and slow mold growth.
Remove soaked materials that can’t be thoroughly dried or cleaned, including damaged porous items.
Sort the remaining items into salvageable and non-salvageable so you can prioritize cleanup and disposal.
Pump Out Standing Water
Start removing standing water as soon as it’s safe, using a sump pump, wet/dry vacuum, or other appropriate extraction method. You’ll reduce moisture faster and limit mold growth by acting immediately and staying methodical with water extraction techniques.
Choose among sump pump options based on depth, access, and power availability. Work from the deepest area toward the exit, keeping discharge hoses clear and stable. Wear protective gear and verify that electrical sources stay dry.
- Set the pump on a flat, secure surface.
- Monitor flow so you don’t leave hidden pockets.
- Empty the vacuum tank before it overfills.
- Recheck corners and low spots after extraction.
You’re not alone in this step; careful pumping helps your space recover faster and prepares you for the next cleanup phase.
Remove Soaked Materials
Once the bulk water is out, remove soaked items and materials right away so moisture doesn’t keep feeding mold.
Pull up carpet, pads, cardboard, paper goods, and any porous furnishings that stayed wet. Move them out of the affected area fast, and keep pathways clear so your team can work safely together.
During your water damage assessment, note which materials are saturated, swollen, or contaminated, since those conditions raise mold risk.
Don’t stack wet items indoors, because trapped humidity can spread spores. Use gloves and boots, and bag small debris before transport.
These mold prevention strategies help you cut off the damp source, reduce odor, and prepare the space for drying. The sooner you remove absorbed water from materials, the better your cleanup outcome will be.
Sort Salvageable Items
First, sort salvageable items from unsalvageable ones and remove any standing water so moisture doesn’t keep spreading. You’ll protect your space by doing quick item evaluation and making salvage prioritization decisions before mold gains a foothold.
Move dry, intact belongings to a clean, ventilated area. Set aside porous materials that stayed soaked, since they often trap contamination.
- Check furniture, boxes, and textiles for swelling, staining, and odor.
- Lift rugs, cushions, and mats to expose hidden water.
- Bag damaged debris immediately and seal it for disposal.
- Keep only items you can clean, dry, and monitor safely.
Work methodically so your team stays coordinated and your cleanup area remains manageable.
Dry Walls, Floors, and Ceilings
Use fans, dehumidifiers, and open windows to remove moisture from walls, floors, and ceilings as quickly as possible.
You should strip wet baseboards, pull off soaked insulation, and expose hidden cavities so air can circulate. Keep furniture and boxes away from damp surfaces, and lift rugs to dry both sides.
Check wall sheathing, subfloors, and ceiling panels daily; if they stay swollen, soft, or distorted, plan for drywall replacement or ceiling restoration.
Run equipment nonstop until moisture readings return to normal. Aim airflow along surfaces, not just into the room.
If you’re working with your cleanup crew, stay coordinated and keep each zone separated so everyone can move fast and safely.
Don’t close up materials too soon, or trapped moisture can trigger new mold growth.
Clean Mold-Contaminated Surfaces
After the area is dry, scrub mold-contaminated hard surfaces with detergent and water, then rinse and dry them completely. You’ll remove most visible growth by using steady pressure and clean cloths, and you’ll keep your cleanup crew safer by working one section at a time.
Use practical mold removal techniques on nonporous materials only; if the finish stays stained, repeat the wash rather than sealing it in. For shared spaces, label cleaned zones so everyone knows what’s safe to reuse.
- Wear gloves and eye protection.
- Change rinse water when it turns cloudy.
- Use separate towels for dirty and clean areas.
- Ventilate the room while you work.
These surface cleaning methods help you restore order fast and support your team’s recovery.
Check HVACs and Attics for Mold
Inspect HVAC units, ductwork, insulation, and attic framing for visible mold, musty odors, and water stains before you restart the system or store items overhead. You’ll protect your crew and household by checking supply registers, drip pans, and filter housings during HVAC maintenance.
If you spot damp insulation or dusty growth, remove and replace wet materials, then wipe hard surfaces dry. Keep attic ventilation open so moisture can escape and hidden condensation doesn’t return.
Look for warped sheathing, stained joists, and rusted fasteners, which signal ongoing wetting. Run fans only after you confirm the space is dry. Seal gaps around penetrations to limit humid air movement.
When to Call Mold Remediation Pros
Call a mold remediation professional when the affected area is large, the growth keeps returning, or water has soaked porous materials like drywall, insulation, or subflooring.
You’re likely past DIY cleanup when mold growth covers more than 10 square feet, spreads behind walls, or causes a strong odor.
Professional services use containment, filtration, and removal methods that protect your space and your team.
- Call if you see black, green, or white colonies.
- Call if occupants report coughing or irritation.
- Call if moisture reached hidden cavities.
- Call if cleanup needs negative pressure or HEPA equipment.
Choosing pros helps you act with confidence and stay connected to a safer home.
Prevent Mold After Flood Damage
To prevent mold after flood damage, dry the space within 24 to 48 hours and remove standing water as quickly as possible.
You should open windows, run fans, and use dehumidifiers to lower moisture in walls, floors, and air. Remove wet rugs, drywall, insulation, and other porous materials that stay damp.
Clean hard surfaces with detergent and water, then dry them completely. Inspect hidden areas behind baseboards, under cabinets, and inside closets, because flood damage implications can linger there.
Track humidity and keep it below 60 percent. These mold prevention strategies work best when you act fast and stay consistent.
If materials remain wet or smell musty, you’re not alone—keep drying, monitor daily, and prevent spores from taking hold.
What Full Restoration Includes
Full restoration includes more than surface cleaning: it starts with water extraction, structural drying, and removal of unsalvageable materials.
Then it moves to mold remediation, deodorization, and repairs to affected drywall, flooring, insulation, and framing.
You’ll also get moisture checks, containment, air filtration, and sanitation so your home can rejoin your routine safely.
This keeps your restoration timeline clear and supports mold prevention after cleanup.
- Inspect hidden cavities
- Dry materials to target levels
- Remove contaminated debris
- Rebuild damaged assemblies
You deserve a crew that explains each step, documents progress, and coordinates trades.
When you know what’s next, you can plan with confidence and stay connected to the recovery process.
Frequently Asked Questions
How Soon Should I Call My Insurance After Flood Damage?
Call your insurer immediately, ideally within 24 hours. You’ll protect insurance claims, confirm flood coverage, and speed documentation. Report losses, photos, and receipts fast; your agent can guide you through next steps.
Can I Stay in My Home During Mold Cleanup?
You can’t stay if mold cleanup risks your health. Until testing confirms low mold exposure and the cleanup duration is short, relocate. Like a storm shelter, safe space matters; follow remediation guidance and ventilation protocols.
What Protective Gear Should I Wear During Cleanup?
Wear protective gloves, respirator masks, goggles, and long sleeves. You’ll limit skin contact and inhalation while scraping, bagging, and cleaning. Choose N95 or better, and replace wet gear immediately to stay safe.
How Do I Know if Mold Is Inside Insulation?
You’ll know through insulation inspection and moisture detection. Look for discoloration, odor, or dampness—who wants hidden mold? Cut a small access point, check the cavity, and confirm with a meter or professional test.
Will Mold Return After Professional Restoration?
Yes, mold can return if moisture remains; you reduce risk by controlling mold regrowth factors and verifying restoration effectiveness. You’ll belong to a healthier space when you inspect hidden damp areas and maintain ventilation.
Conclusion
Act quickly, and you can starve mold before it takes root. You’ve got to remove water, dry hidden spaces, and clean contaminated surfaces like you’re shutting a door on a storm. Keep inspecting HVACs, attics, and wall cavities, because moisture can hide like a thief in the dark. If the damage is widespread or concealed, call remediation pros. Fast, disciplined cleanup keeps your home from becoming mold’s playground.
Recent Posts
Why Does Leak Water Damage Cause Mold?
Like a slow leak in a ship’s hull, water damage in your home keeps feeding
Ceiling Leak Water Damage Mold Repair Guide
You notice a ceiling stain the same day a drip starts, and that coincidence matters
Why Mold Remediation Matters After Flooding
When floodwater lingers, mold doesn’t wait. It can spread through wet drywall, saturated insulation, and